General Page Editing Resources for myUSF
Create a New Page
-
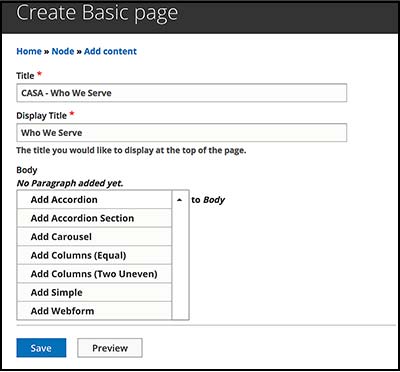
Go to Manage on the top black bar > Click on Content > Then Add Content button > Select Basic Page
-
The Title field is how you want the page to be found in the admin screen. Follow a strict naming convention to help you locate your pages later. Input the name of your department, followed by a “-”, followed by the name of the page (e.g. CASA - Who We Serve). This will allow anyone else in your division, or anyone from the web services team, to easily search through the Admin Content Search to find your department pages.
For this exercise, use “Training # - Training Page” (# use your assigned number)
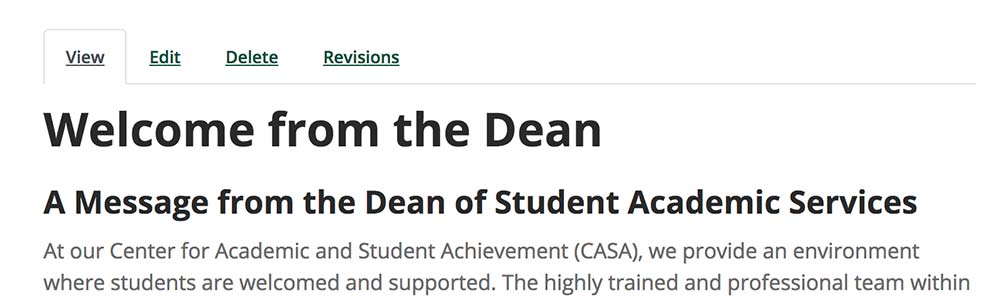
The Display Title is what will display on as the heading 1 on your page. (So you will never need to place a heading 1 on the page, and the highest you will need to place is a heading 2).
Ex: CASA
-
In myUSF, the different components of the page are called paragraphs. Using the example page as a reference, it might help to think of every different component on the page as individual pieces that you can move around to create your page.
In the Body area, select the paragraph type that you’d like to add to the page from the dropdown below “Body”. For paragraph options see the screenshot on previous page.
Paragraph Types
SIMPLE: Simple text box with WYSIWYG editor. Anytime you want to add text, images or files, you will select this option. This will be the most used option.
Click on Add Simple from the Paragraphs dropdown to add.
Adding text
In the body section select Add Simple > then type in the WYSIWYG.
(When adding text follow accessibility best practices for heading structure - H1 followed by H2, followed by H3...etc.)
Add headings using the Heading Dropdown (It is the dropdown that says “Normal” by default).
Create lists by selecting the Bulleted List or Numbered List Icon
Add additional styles (Intro Text, etc.) by highlighting the text that you would like to style
Note: Styling in the WYSIWYG does not always resemble what you will see on the live site. Please remember to always check the page you are working on after you save to make sure it looks the way you want it to.
Adding Files
Select Add Simple > Select Link icon > Click on Open File Browser > find the folder with your department name > Select to upload a file into that folder
(We’d recommend you keep at least one folder for images, and one folder for documents, just to stay organized.)
Note: You will have a folder with your username as the title. This will be a private folder that no one else will have access to. This is where you will upload files that you do not want anyone else to use. Upload files that you would like others to be able to link to or use to the public documents folder.
Note: If you upload a file with the same name as a different file, it will automatically replace the old file. This will prevent links from breaking around the site. It is helpful to follow a naming convention for your files so you can easily replace them in the future.
Adding images (Similar process to adding a file)
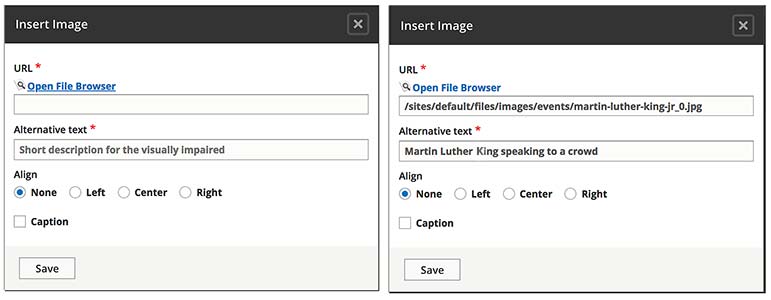
Select Add Simple > Select Image icon > Click on Open File Browser > find the folder with your department name > Select to upload a file into that folder or use an existing file.
In the media browser, you can choose to resize an image by selecting the “Resize” option. You can choose to overwrite or make a copy of the original image.
You can choose to align an image right or left when you place it. If the image is not full width, the image will align to whichever side of the page you choose. You can then add text, and it will automatically fill in the space next to the image. If you choose not to align the image, it will stay centered.
COLUMNS (EQUAL) : Separates page in equal columns.
Select Add Columns(Equal) > In Column Content Area click on Add Simple > Put in the content for the first column using WYSIWYG > Click on Add Simple to add content to the second column
COLUMNS (TWO UNEVEN): Creates two columns on the page of adjustable size. Uses the same process as Columns (Equal).
ACCORDION: Used mainly for FAQs or text heavy content. Accordion is the wrapper that holds each item. Without it your content won’t collapse. Accordion Section holds the content. You will always need to first place an Accordion before placing the Accordion Section.
Select Add Accordion > Fill out Accordion Section Title which is the visible part when it is collapsed > Fill out the Accordion Section Body which will be hidden when collapsed
To add more items to the same accordion click on Add Accordion Section.
Note: Use this option sparingly. User testing has shown that people prefer to not have to click to see additional content. We recommend only using the accordion paragraph type for very text heavy or FAQ style pages.
CAROUSEL: Creates a slideshow of images.
Select Add Carousel > in the Slide Content area select Add Simple > in the WYSIWYG click on Image Icon > load image and add caption or alt text
Adding images (Similar process to adding a file)
Select Add Simple > Select Image icon > Click on Open File Browser > find the folder with your name > Select to upload a file into that folder or use an existing file
Recommended image size is 1800 x 1000 pixels.
Note: You will have a folder with your username as the title. This will be a private folder that no one else will have access to. This is where you will upload images that you do not want anyone else to use. Upload images that you would like others to be able to use to the public images folder.
Accessibility
Alternative text provides a text alternative that describes images for those who may not be able to see the image. Don’t include alt text that is the same as image caption text. If an image has a caption, input empty quotes (“ ”) into the alt text field.
 For each image you want to add, select Add Simple again.
Images loaded to the carousel need to have the same dimensions for the carousel to work as expected.
Recommended image size is 1800 x 1000 pixels.
To delete content in the body area, click on the Remove button on the right > then click on Confirm Removal button

To edit the HTML of the page select Source button in the WYSIWYG editor

Edit a Page
Click on Edit tab > Here is where you can add paragraphs, remove paragraphs, edit existing paragraphs, change the page title, and change the page alias.
Note: You can also revert to an earlier version of the page by selecting the Revisions tab, finding the version you would like to revert to, and selecting Revert.
Add an Alias
You must always add an alias to a newly created page.
-
Add the alias
Go to the grey box on the right hand side of the page > Click on URL Path Settings dropdown at the bottom > enter the alias
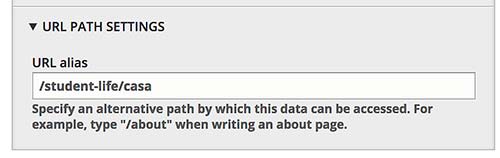
This should usually be the department name (sometimes abbreviated) with spaces separated by dashes, followed by a “/”, followed by the title page (all lowercase, spaces indicated by dashes).
For this exercise, please choose “/training#/training-page” (# use your assigned number) and save.
Note: You will need to remember this URL when adding a menu link to your page’s menu.
-
URL structuring importance
URL structure is important for several reasons in myUSF. For SEO (search engine optimization) reasons, it’s important that the alias closely matches the title of the page, and that spaces are represented by dashes. It also determines the template of your page, which includes the display of the menu, contact box, and quick links.
If you need a new quick links, contact box, or menu created and placed on a certain alias structure, please request one from webservices@usfca.edu
Add Link to Menu
On the page find the Main Menu (left hand side of the page) > Select the Pencil Icon that appears when you hover over the menu > Select Edit Menu > Select Add Link
Menu Link Title: Enter the title of the link as you want it to appear on the menu.
Link: Enter the URL of the page you are linking to /training#/training-page” (# use your assigned number)
Note: To reorder your menu items Select Edit Menu > and select the icon to the left of the menu title to drag the menu item into the appropriate position. (You can nest a menu item under another menu item by dragging the menu item to the right.)
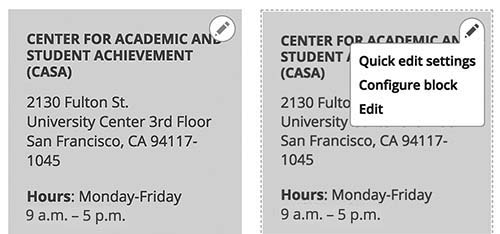
Edit Contact Box
On the page find the Contact Box > Select the Pencil Icon that appears when you hover over it > Select Edit > Fill in the desired fields
The Block Description is how web services will locate the block in the backend, so please do not change it (it will not appear anywhere on the contact box).
There are also social media areas at the bottom. If you choose not to add the social media field, just remove the default field.
Note: There is currently caching on the contact box for performance reasons. So it will take several minutes for you to see your changes.
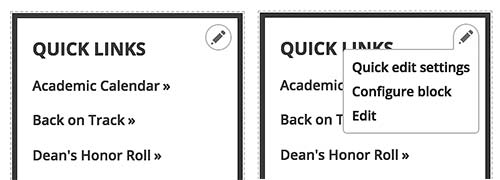
Edit Quick Links
On the page find Quick Links > Select the Pencil Icon that appears when you hover over the quick links > Select Edit > Add the desired quick link
Link Text field will be the title of the link as it appears on the quick links.
Example: “USFCA”
Link field will be the URL of the page you are linking to
Example: https://www.usfca.edu
Please note there is currently caching on the quick links for performance reasons. So it will take several minutes for you to see your changes.
Find a Page
To find a page again, you can either search through the pages of your site using the navigation, or access it through the Admin Search by selecting “Admin” then selecting “Content”. On that page, you can search by page Title, and you can also filter by your username.
Thanks for attending and happy editing! Please reach out to webservices@usfca.edu with any questions, concerns, or feedback.
Adding Anchors
An anchor is created using the <a> tag. Linking to anchors is very similar to adding normal links. Normal links always point to the top of a page. Anchors point to a place within a page.
A "#" in front of a link location specifies that the link is pointing to an anchor on a page. (Anchor meaning a specific place in the middle of your page).
To link to an anchor you need to:
- Create a link pointing to the anchor
- Create the anchor itself.
If you want to create an anchor called chapter4, you simply add this line where you want the anchor to be:
<a id="chapter4"></a>
After doing this, you can make a link pointing to the anchor using the normal <a href> tag, like this:
<a href="#chapter4">Read chapter 4 </a>
Styles
Block Quote
To create a blockquote with the proper styling, first, write the text out for the quote. Then, highlight the text you would like to make a quote, and select the quote icon in the WYSIWYG toolbar. To add the author, highlight the author's name and select "Cite" from the styles dropdown.
Additional Styling Instructions can be found here »
Note:
When linking to an anchor on a page you need to put a # in front of the anchor.
When you link to an anchor on the same page, simply enter
<a href="#YourAnchor">Text Linking to Anchor</a>
When you link to anchors on external pages use this syntax:
<a href="http://www.yahoo.com#YahoosAnchor">Text Linking to Anchor on a Different Page</a>
Anchors are generally used when you create pages with considerable amounts of text. You would typically make an index at the top of the page linking to the anchors that have been added to key places in the text that follows.