Best Practices for Securing Zoom Meetings

This document covers some of the best practices for safe and secure meetings for business and the classroom. In this document, we will go over the account settings that are enabled by default and ones that you can choose to enable. We will also cover in-meeting strategies to create a safe environment for you and your attendees.
What is Zoom bombing?
Zoom bombing is a term to describe when an outside entity disrupts your meeting by sharing their screen with disturbing images or other inappropriate content. It has been happening to meetings across the country, but may be particularly aimed at spreading hate materials in relation to race, gender, etc.
Tips for Avoiding Zoom Bombing
Never post links to your zoom meetings publicly (e.g., via Twitter or on Social Media). Instead, limit your Zoom meeting invitations to your Canvas course, email and calendar invitations you initiate.
Please review the following Zoom settings to further secure your Zoom account and meetings. Access your Zoom settings by logging in using your USF credentials.
>> Click open menu below to view detail steps:
Download a copy of this instruction (Updated September 22, 2020)
It is best practice for all faculty, staff and students to sign into the Zoom desktop app on Mac/PC using SSO (single sign on). The steps are in the Zoom Sign-in Guide.
Configuring the Waiting Room in your account
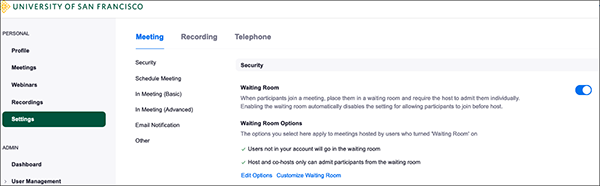
This setting in the Security section your Meeting settings on the usfca.zoom.us site will allow signed in users to automatically join the meeting but place Guest Participants in the waiting room to be admitted manually by the host. Currently, the setting is enabled by default and is set to place all participants into the waiting room for both scheduled meetings and the Personal meeting ID.
- Sign In to your Zoom account: http://usfca.zoom.us
- Select Settings.
- In the Security section, and locate Waiting room.
- Note that the default is to hold Users not in your account (see picture above). Selecting this option will allow authenticated users to enter your meeting room while all others will need to be manually admitted by the meeting host (you).
- Click on Edit Options to view the Waiting Room settings.
- The default setting is Users not in your account (see picture above). This option will allow authenticated users to enter your meeting room while all others will need to be manually admitted by the meeting host.
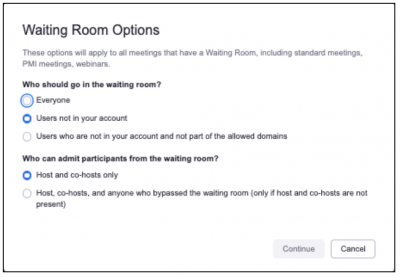
7. You can also select the option to have authenticated users as well as enter the domains for email addresses from outside the university who are seen as allowed domains.

Scheduling with the Waiting Room from the Zoom App
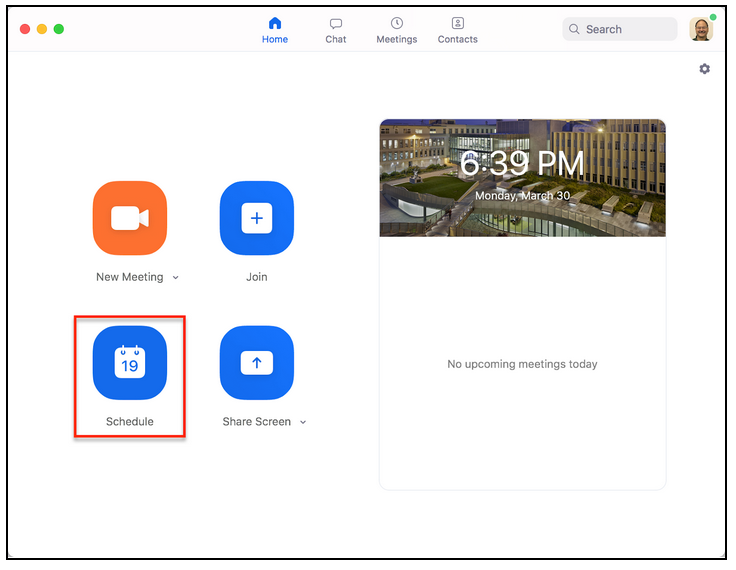
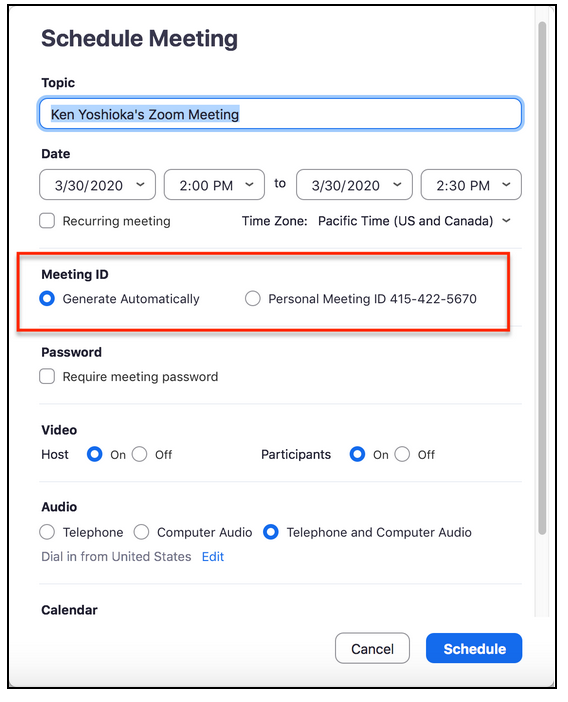
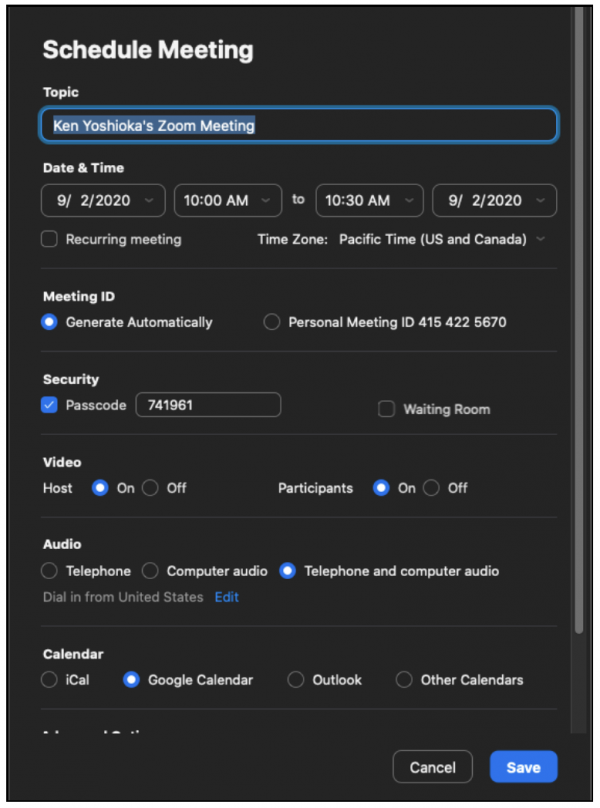
After enabling the setting in your account, schedule a new meeting by clicking on the Schedule button in the Home tab of the Zoom app.
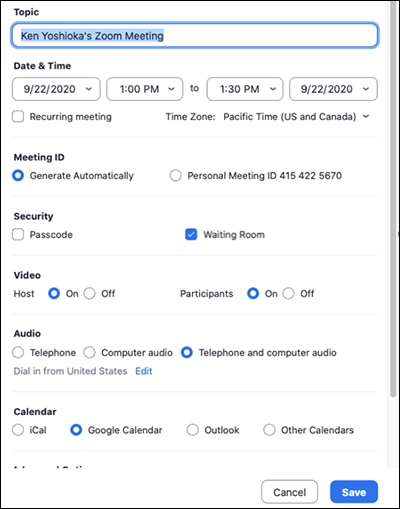
After filling out the meeting information,scroll to the Security section.
Check the box Enable Waiting Room and then click Save to complete the process. of the Scheduling window to view the security options.
Scheduling meetings through the Zoom account page
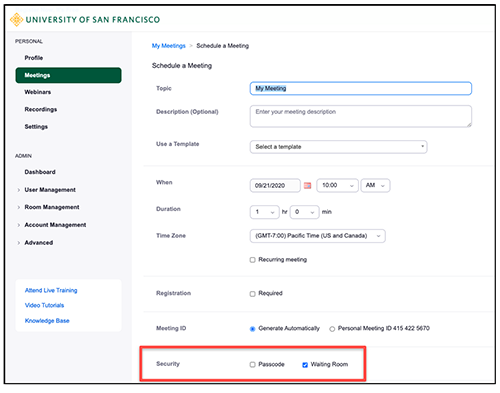
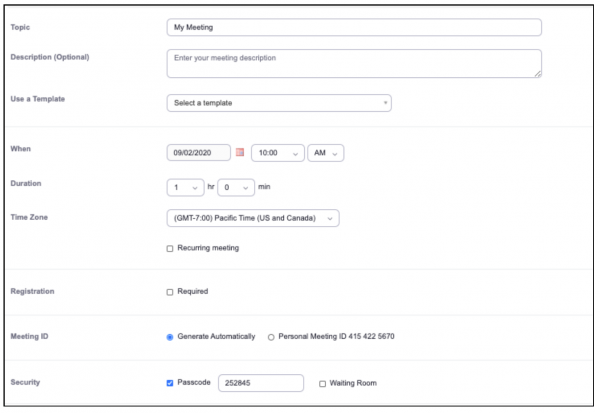
If you are scheduling your meetings through the http://usfca.zoom.us website, sign in on the site and then click on Schedule a New Meeting from the Meetings tab in the left side navigation column.

After filling out the meeting information, scroll to the Security section of the Scheduling window and check the box to Enable Waiting Room; click Save to finish the process.
Configuring your Personal Meeting ID
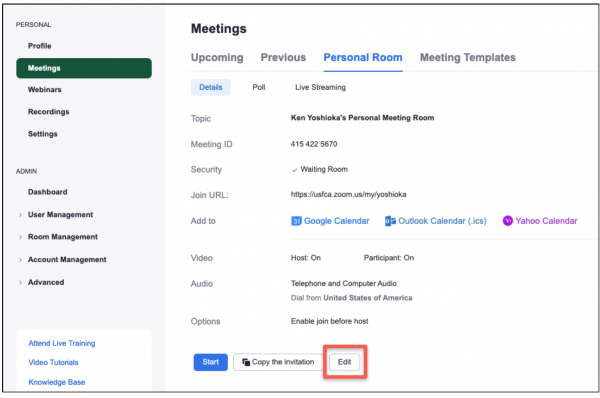
You can also enable the feature in your Personal Meeting ID (PMI) settings so that each meeting using your PMI will have the waiting room for all meetings using your PMI. After signing in to your Zoom account at http://usfca.zoom.us, click on Personal Room from the Meetings tab in the left side navigation column.
At the bottom of the Personal Room window, click on Edit.
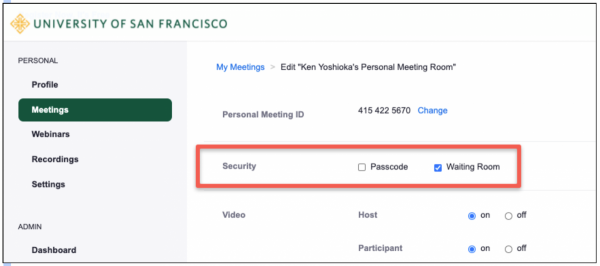
Look for the Security section. Check the box Enable waiting room and click Save to finish the process. Every meeting that uses you PMI will now have the Waiting Room as a default.
Once in the meeting, guests who are not signed in with a USF Zoom account are placed in the waiting room when they join, waiting for the host to admit them. All participants who are signed into their USF Zoom accounts are automatically admitted.

This setting to only allow the host to share screens is enabled by default in all USF user accounts.
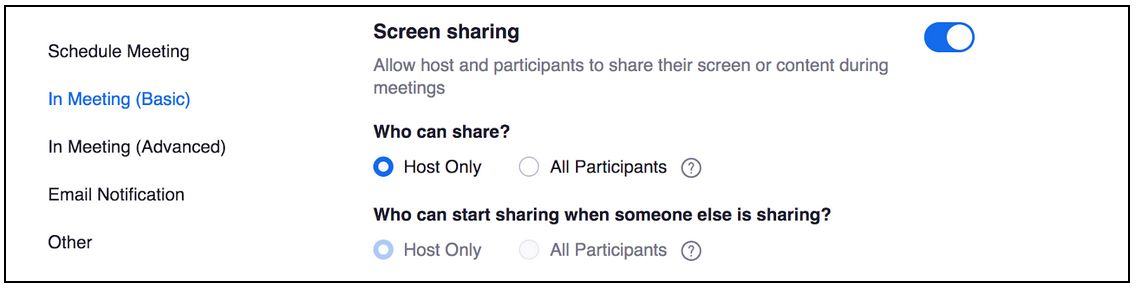
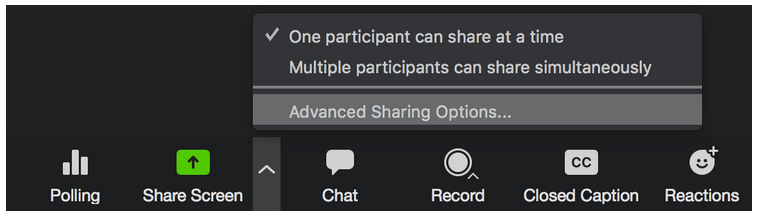
In the meeting, you can enable all participants to share their screens by clicking on the menu icon next to the Share Screen button and select Advanced Options.
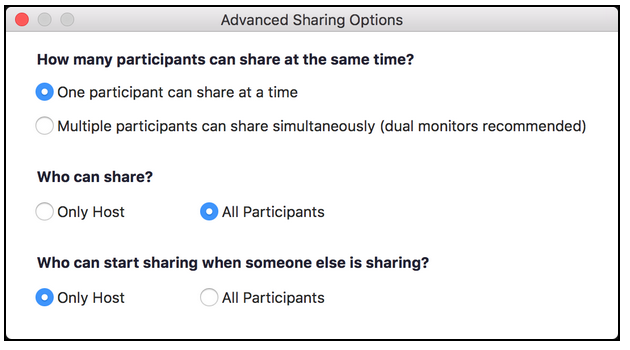
In the Advanced Options, select All Participants in the Who can share section. This will need to be done for every meeting that you will need to have participants share their screens.
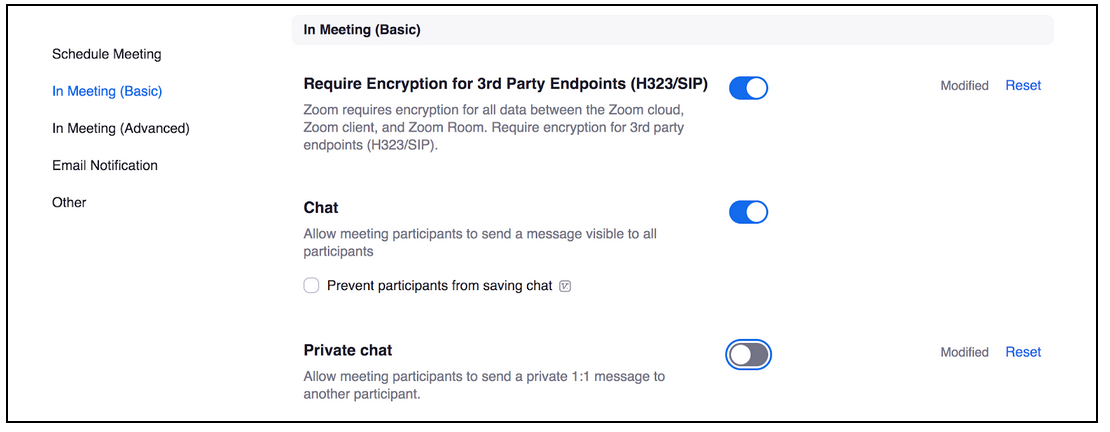
You can also control how chat functions in a meeting through your Zoom account settings. You can prevent private side chats by disabling the Private chat function in the Meeting Basics settings.
In the meeting, when you open the chat panel and click on the dotted menu for chat options, there is no longer an option to allow private chat between participants. Private chat with the host is still allowed.
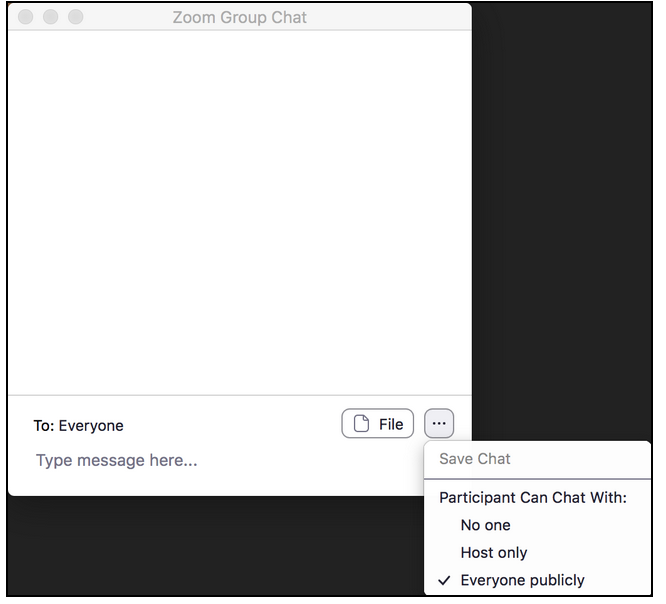
You can also leave the private chat enabled but choose the method you want in the meeting too.

A good practice when scheduling meetings is to use the Personal Meeting ID with discretion rather than convenience to provide greater control over who has access to the scheduled meeting. Use automatic for most meetings as a practice to generate a random ID number for the session.
*Another tip to reduce unintended access to your meetings is to NOT have your Personal Meeting ID be a link in your Email signature or as a part of your web page contact information.
In the meeting, there are additional tools to manage participants and meeting accessibility.
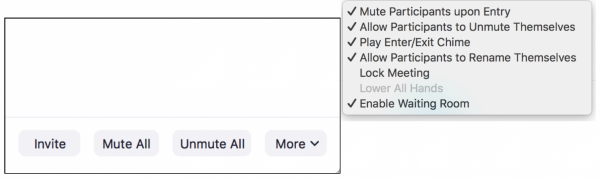
Click on the Participants button in the meeting toolbar at the bottom of the Zoom meeting window.

At the bottom of the Manage participants panel, you can click on the More menu and select Lock Meeting to ensure that no other people can enter the meeting unexpectedly.
Finally you can uncheck the ability for participants to rename themselves with a pseudonym or a fake name.
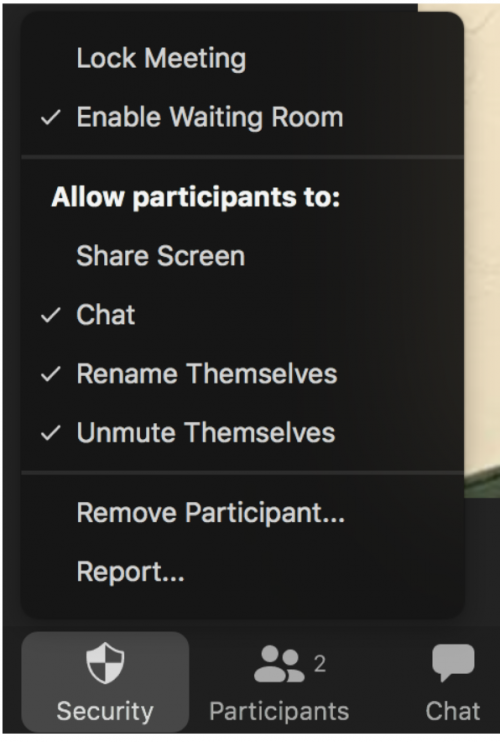
The Security tool, available in the newest version of the Zoom software allows you to access the security tools like lock meeting, remove participant, enable waiting room allowing participant screen sharing all from the Zoom toolbar.
When you schedule meetings, you can also enable a meeting passcode for the scheduled session as well as for your Personal Meeting ID. As a rule, if you schedule a meeting with a passcode enabled, send the passcode in a separate email to the participants, not in the same email as the invitation.
If you schedule the meeting through the https://usfca.zoom.us site, check the box Passcode and create a passcode in the field to the right.
If you schedule through the Zoom app, check the box Passcode and create a passcode in the field to the right.
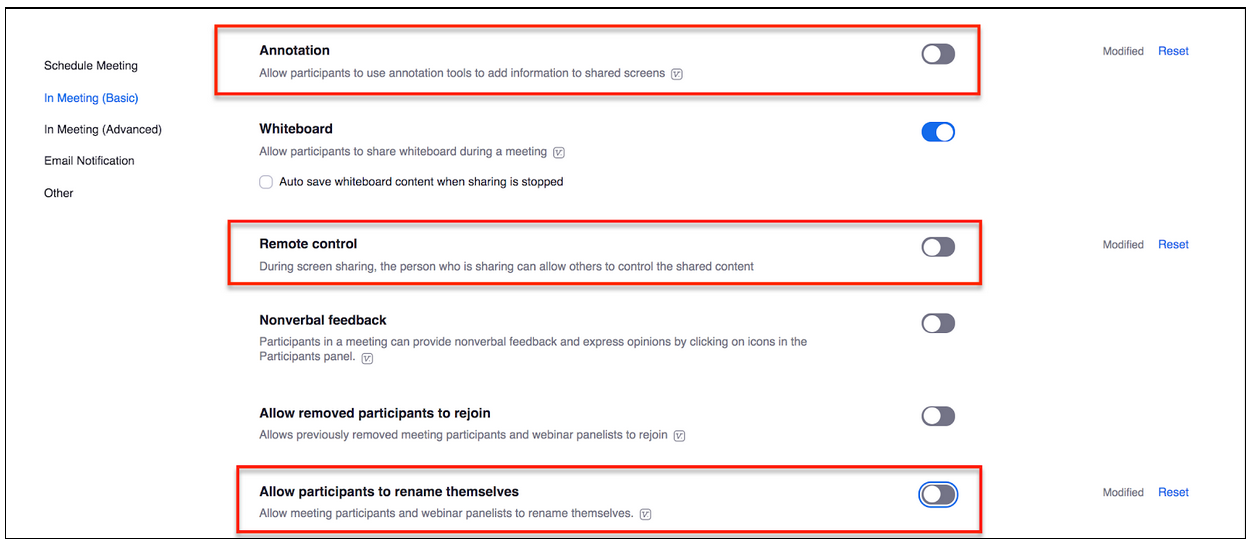
There are a number of settings you can change to refine the control over interaction in a meeting. To do this sign into your USF Zoom account at https://usfca.zoom.us and click on Settings on the left side of the page. Scroll down the page to reach the In meeting (basics) section to check the following settings.
Annotation: You can disable the option for participants to annotate on any shared screen to prevent any unwanted drawing or writing on a shared screen.
Remote Control: You can also disable the ability for a participant to request control over a shared screen.
Allow Participants to Rename Themselves: You can set the default for every meeting to prevent a participant to rename themselves with a pseudonym or a fake name.
In this age of digital opportunity and availability you will want to have, as a part of your syllabus, guidelines for maintaining privacy and content rights for all faculty and students. This can include recording of content through tools outside of Zoom and of sharing recordings outside the classroom. Inform and educate your students to protect the privacy and security of you as the instructor and of their fellow classmates.
Only the host has the ability to record meetings, whether to the computer or to the cloud. Participants may see the record button but clicking on the button will give the message that permission must be given by the host.
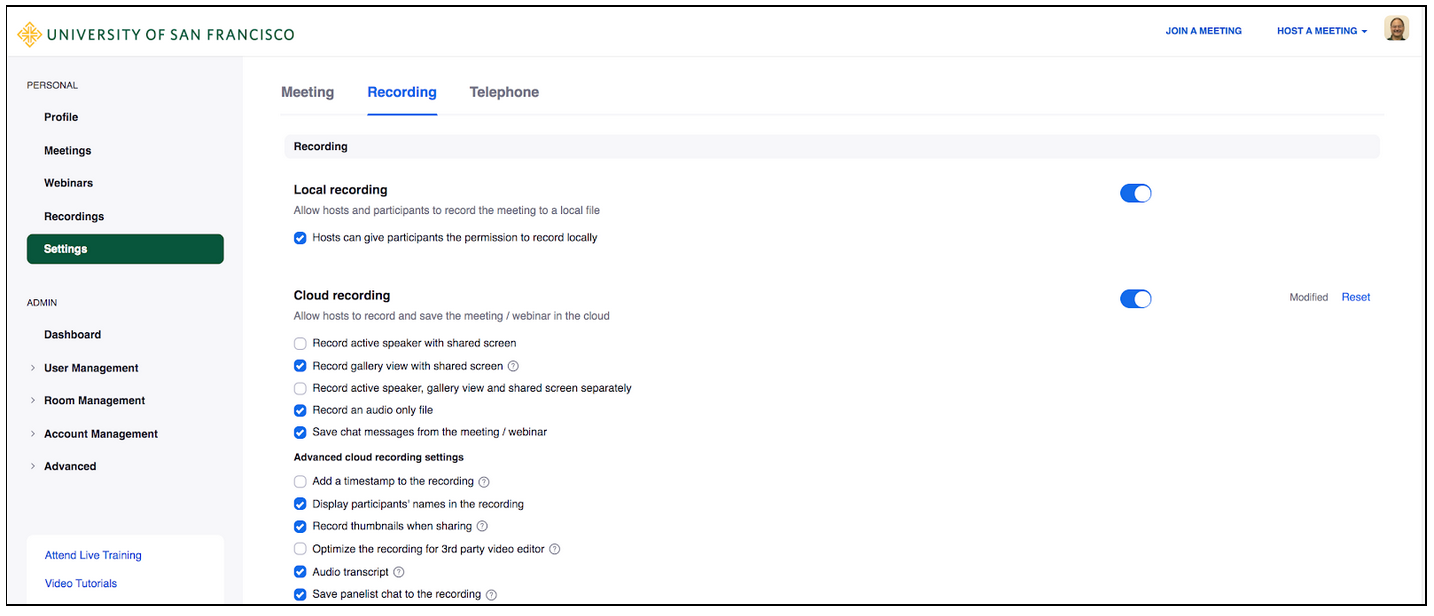
Zoom made a change to the default settings for cloud recordings for the university where all cloud recordings were set to require a password to view.
This setting can be adjusted in your own account by signing in to the https://usfca.zoom.us site and clicking on Settings. Then in the top center portion of the settings page click on Recording.
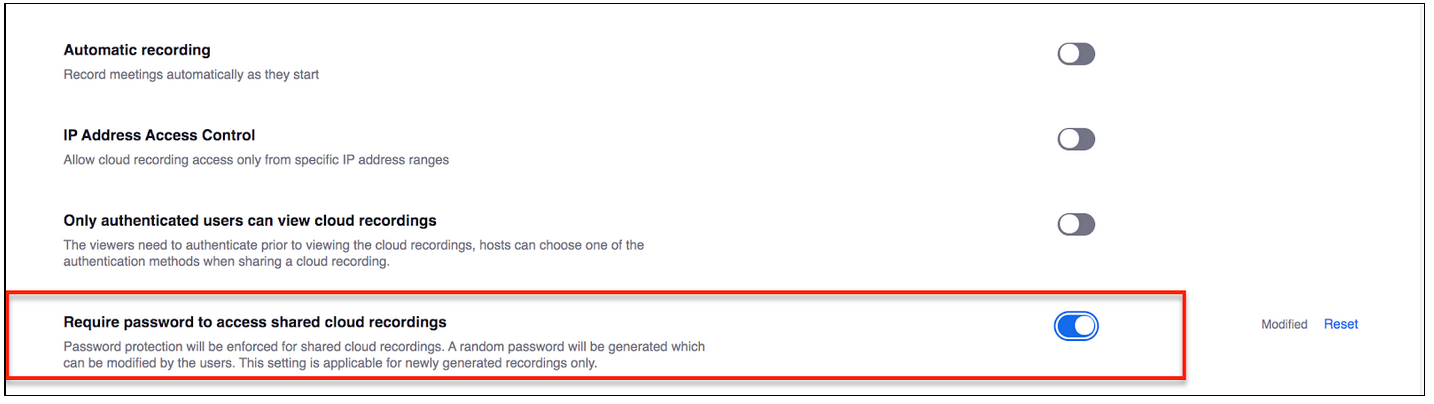
Scroll down the page and you will see the setting for the password requirement for any new cloud recording. Only if you feel that the recordings do not need to be password protected. Click the button to be gray to disable the setting.
As the host, you can determine how accessible each meeting cloud recording is going to be to viewers. When you sign in to your USF Zoom account at https://usfca.zoom.us and click on the Recordings tab on the left side of the page, you can click on a link of the recording you would like to share.
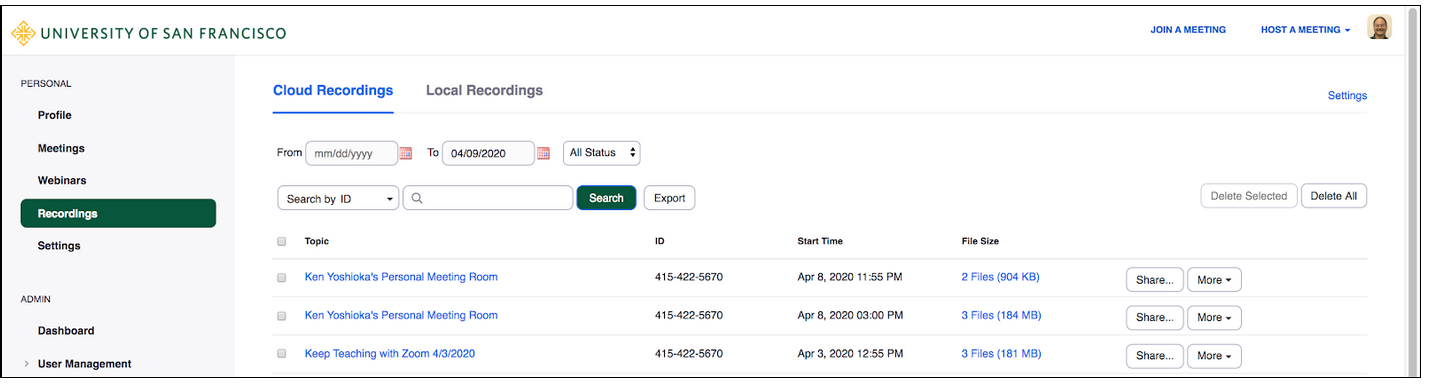
In the Recording Details page, click on the Share icon will provide sharing permissions and options.

Here you can select whether the recording is publicly available or only to the USF authenticated users. You can also change whether the recording can be downloaded as a video file. Finally, the default setting is to require a password and you can choose a password of your choice or disable the option.
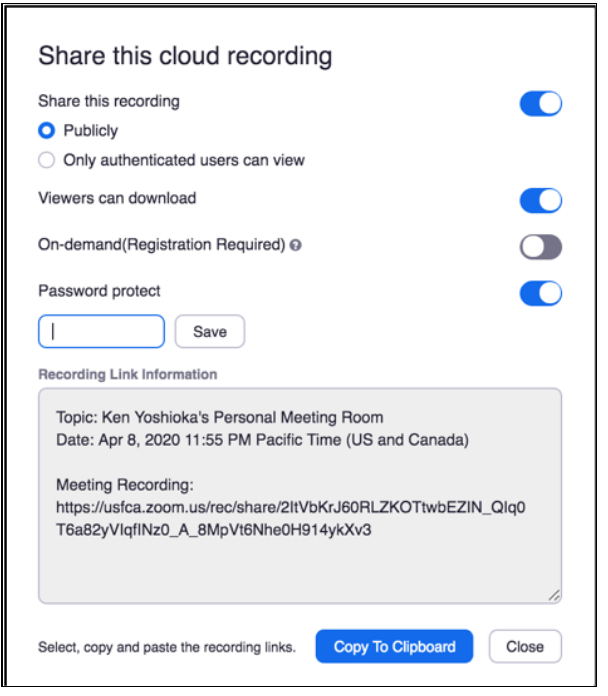
Note that if you set the permissions to "Only authenticated users can view", the students need to sign in through Single Sign On (SSO) after clicking on the link for the recording.