Web Manager Editing Documentation
Creating Blocks (Contact Boxes, Quick Links, Custom Blocks)
- Go to Admin > Structure
- Select "Block Layout"
- Select "Custom Block Library"
- Select "Add Custom Block"
- Select the type of Block you'd like to add
- Contact Box
- Quick Links
- Custom Block (Useful for Callouts, etc.)
- Main Navigation Block - Ignore this one. Submenus are added a different way
Placing Blocks
- Once you fill out the fields, you'll need to place the block you just created. Go back to "Block Layout"
- This is the page that has all the blocks across the entire myUSF site. The majority of the time, you'll want to place the blocks in either the "Sidebar First" area (left column) or "Sidebar Second" area (right column).
- Once you place the block, the two main things you will need to decide the URL structure that it will show up for and whether the title of the block will be displayed.
- There is a "Display Title" checkbox that will determine whether that gets displayed.
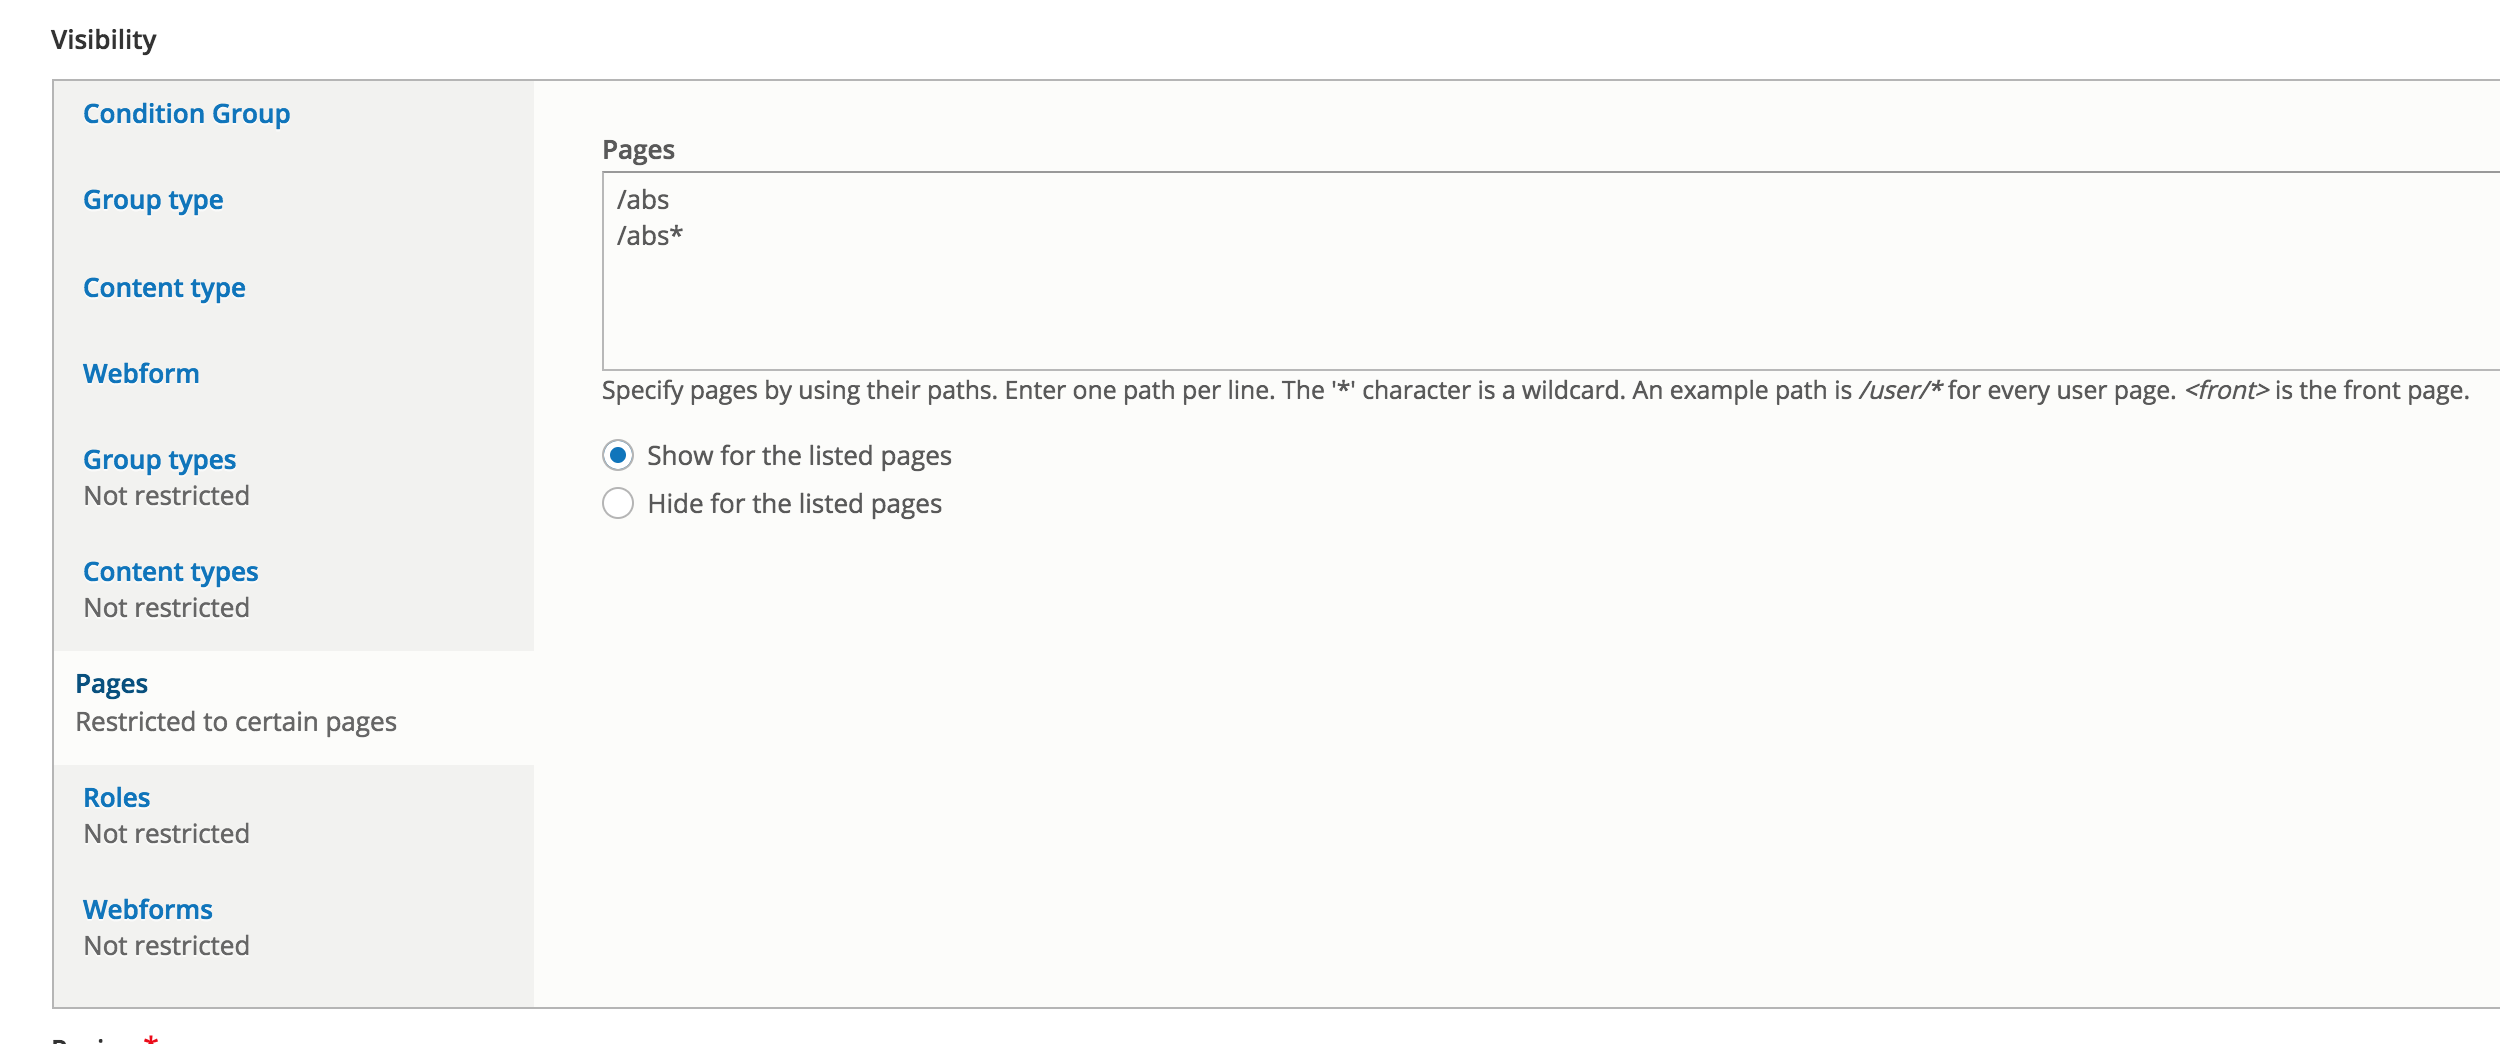
- IMPORTANT: Under "Visibility", go to the "Pages" tab. Add the aliases that will show these blocks. You will usually need to put two different lines here; one for the home page of the section, and one with the alias followed by a * (wildcard). This needs to be done correctly to ensure that 1. The blocks don't show up across the entire site, and 2. they show up on the pages you want them to show up on.
Webforms
Building a Form
- To create a form, click the Admin button and select Structure. From the list of content types, click on Webform at the bottom of the list.
- On the form creation screen, give the form a Title and a URL, or let the system generate a URL for you.
For the webform title, please enter a title that includes your unit's name in the title so you can find it later among the many forms from the many units, which will sometimes have duplicate names. For example, a feedback form from CIT would be named, CIT Feedback. This title is not what the end user will see. You can enter an alternate title for the form on the page the form appears on. - Click the Publish button.
- You should then be taken to the interface for adding components to the form.
- Entering a name, selecting a component, and clicking the Add button will take you to the interface for configuring the component. After configuring, click the Save button and you're taken back to the first screen with the list of components.
As you build the form, you can click the View button at the top of the component list page and it will show you the form. Click the browser back button to get back to the component list and continue working on the form.
To access forms after they've been created, click the Admin button and select Structure, then Webform. On the following page, you'll see the list of forms in the system. You can edit the form, its components, and produce reports on the submissions here.
Placing the Form On a Page
After making the form, you can add to a page by going to the page you would like to place it on, and selecting "Edit".
On the following screen, add a paragraph of type Webform from the drop-down.
In order to make changes to the form in the future, you will need to hover over the form until a pencil icon appears. You can then select "build" to edit the form itself, or "settings" to edit the settings of the form.
Pulling Submission Results
- To view or download webform submission results, first click the "Admin" button, then "Structure" from the dropdown.
- Switch over to the webforms tab.
- Search for your form to find the webform you'd like to edit, and select "Submissions" to view individual submissions, or "Download" to export as an Excel Spreadsheet.