myUSF Webform Editing Guide
Building a Form
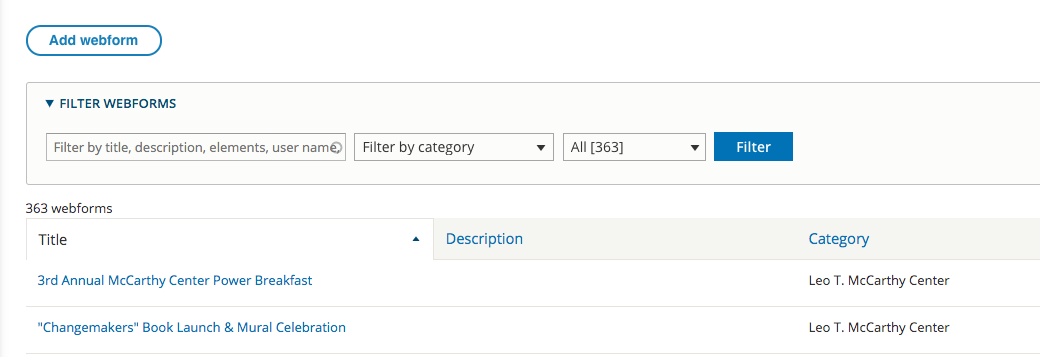
- To create a form, click the "Manage" button and select "Structure". From the list of options, click on Webform at the bottom of the list.

- On the next form will be a list of existing webforms and a button to create a new webform. Select "Add Webform" to create a new webform.
- On the form creation screen, give the form a title and a URL, or let the system generate a URL for you.
For the webform title, please enter a title that includes your unit's name in the title so you can find it later among the many forms from the many units, which will sometimes have duplicate names. For example, a feedback form from ETS would be named ETS Feedback. This title is not what the end-user will see. You can enter an alternate title for the form on the page the form appears on.
Optionally, add the form to a category so it's easier to locate later. If the category doesn't already exist, feel free to create one.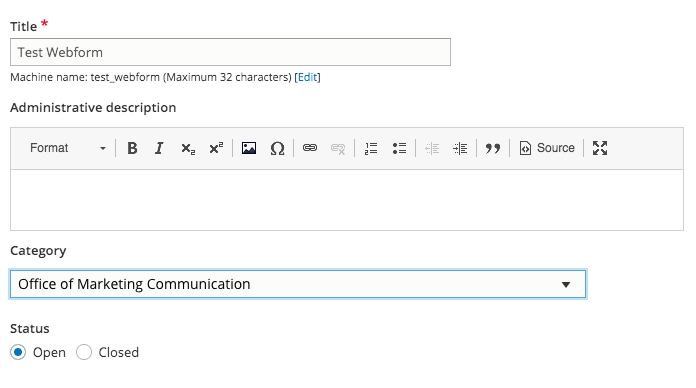
- Click the Publish button. You should then be taken to the interface for adding elements to the form. A list of common elements can be found below in the "Common Form Elements" section.
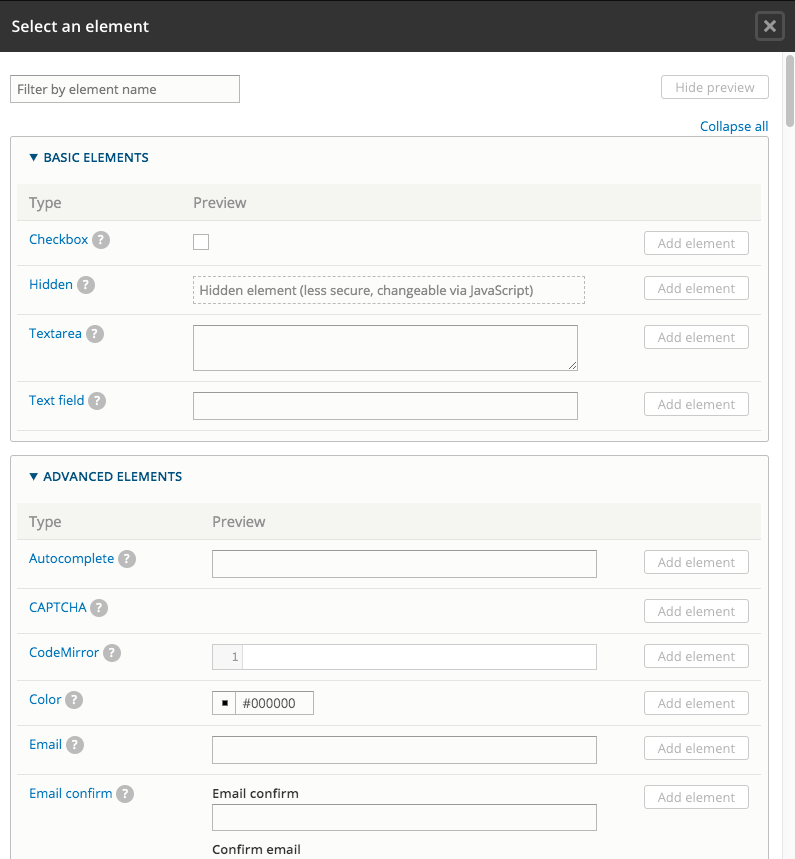
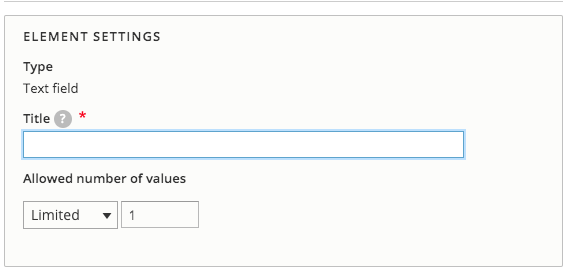
- Selecting an element type and clicking the "Add Element" button will take you to the interface for configuring the component. Enter a title for the field ("Email", "Name", "Today's Date", etc.), and fill out any additional configurations for the field. The default configuration is sufficient for the majority of forms. After configuring, click the Save button and you'll be taken back to the first screen with the list of elements.
As you build the form, you can click the View button at the top of the component list page and it will show you the form. Click the browser back button to get back to the component list and continue working on the form.
To access forms after they've been created, click the Admin button and select Structure, then Webform. On the following page, you'll see the list of forms in the system. You can edit the form, its components, and produce reports on the submissions here.
Common Form Elements
Below are some of the most common elements for webforms. For questions about any elements or webform functionality, please contact webservices@usfca.edu.
Text Field – Provides a form element for input of a single-line text.
Text-Area – Provides a form element for input of multiple-line text.
Email – Provides a form element for entering an email address.
Terms of Service – Provides a "Terms of Service" element.
Basic HTML – Provides an element to render basic text.
Checkboxes – Provides a form element for a set of checkboxes where the form submitter is allowed to select multiple options.
Radios – Provides a form element for a set of buttons where the form submitter is only allowed to select one option.
Date – Provides a form element for date selection.
Setting up Confirmation Emails and Email Notifications
- To set up confirmation emails, go to "Settings" and "Emails/Handlers".
- Select "Add Email" to add an email notification or confirmation email
- On the following Email Handler editing screen, add a title (it can be something generic, like "Email").
- To add a notification email that will be sent upon each form submission, add "Custom To Email Address" to the "To Email" field and input the desired email address you would like notifications sent to.
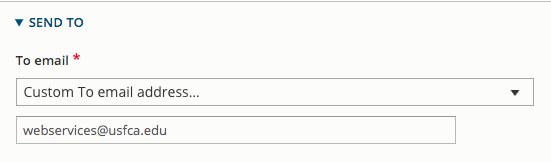
- To add a confirmation email, you must already be requiring the form submitter to input their email address. Add the "Email", underneath "Elements" in the dropdown menu in "To Email" to add that field.
Placing the Form On a Page
After making the form, you can add to a page by going to the page you would like to place it on, and selecting "Edit".
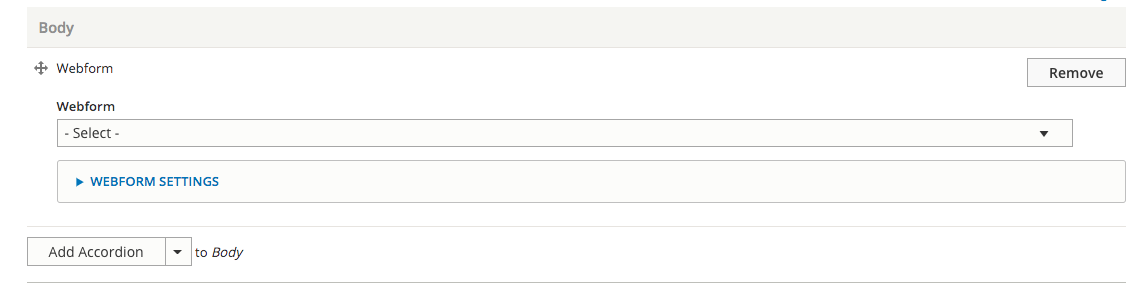
On the following screen, add a paragraph of type Webform from the drop-down.
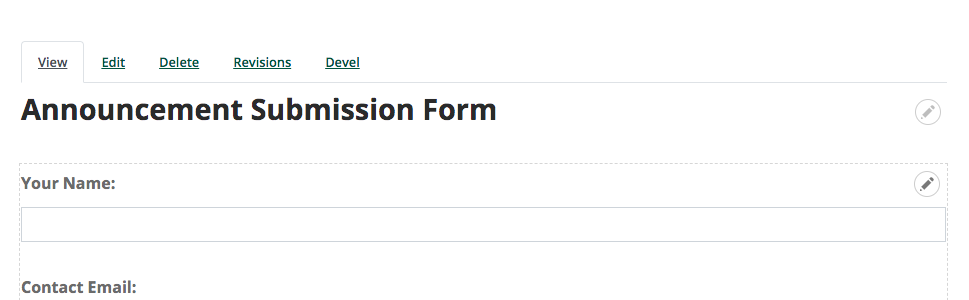
In order to make changes to the form in the future, you will need to hover over the form until a pencil icon appears. You can then select "build" to edit the form itself, or "settings" to edit the settings of the form.
Pulling Submission Results
- To view or download webform submission results, first click the "Manage" button, then "Structure" from the dropdown.
- If you do not see this toolbar or "Manage" button when you are logged into myUSF, please see the below titled "WEBFORM EDITORS WHO DO NOT HAVE THE ADMIN TOOLBAR".
- Switch over to the webforms tab.
- Search for your form to find the webform you'd like to edit, and select "Submissions" to view individual submissions, or "Download" to export as an Excel Spreadsheet.

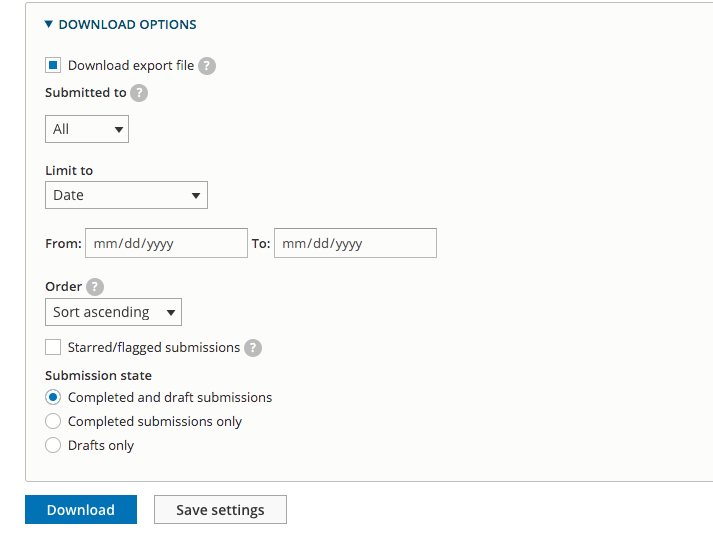
- The system allows you to option to only download a specified number of submission results, or submissions between a certain date period. You can configure these options under the "Limit To" field in the "Download Options" section
Resend Submission Results
- Go into the results tab of the webform.
- Make sure you're within the "Submissions" section.
- There should be a table of results below. To resend a confirmation email, click the arrow next to "Edit" under the "Operations" column. Select "Resend".
- Select which email you would like to resend (you will be able to adjust the To/From email, To/From name, Subject, and Message).
- Select "Resend Message"
webform Editors who do not have the admin toolbar
Webform editors who have not completed either the myUSF website training of the USF web accessibility training will not have access the admin toolbar, but they will still have access to pull webform results by accessing this link directly: https://myusf.usfca.edu/admin/structure/webform
For any additional questions or trainings, please contact webservices@usfca.edu.