myUSF Tips
Welcome to myUSF! The following tips and instructions will get you up to speed on accessing and making the most of, myUSF.
Your Dashboard
myUSF Dashboards are customized based on your role within the University of San Francisco (Student, Staff, Faculty, etc.). The announcements, events, and links that you see are dependent on your role and are custom tailored to you.
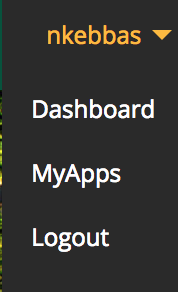
You can access your dashboard at any time by selecting your name in the top right corner of the screen to open a drop-down menu. Then select "Dashboard" to access your personalized dashboard.
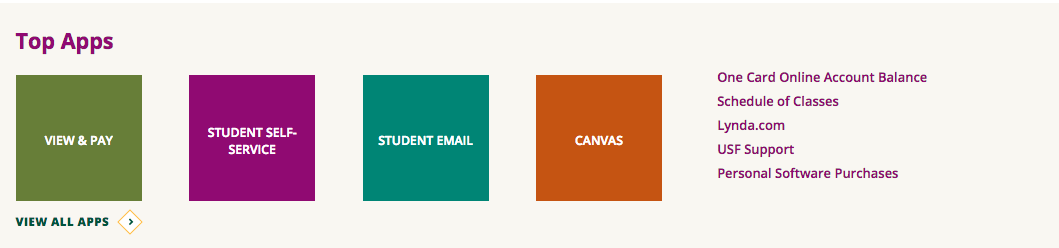
Top Apps
At the top of your dashboard are your Top Apps, which allow you convenient access to popular USF applications, such as your email, self-service, and canvas. Top Apps are determined by your role in the university. You can reorder them by selecting the pencil icon within the Top Apps box. Please note that if you have multiple roles within the university (Student and Employee, etc.), the initial order of your Top Apps will be determined by your primary role.
The top four links in your Top Apps list will appear as multicolored buttons.
myLinks
Right below the Top Apps is your set of personalized links, myLinks. These links allow you to quickly access different sites, sections, and resources on myUSF. The left-most section of links, labeled "Popular Links", is a set default links for your role within the university. These will be updated based on what should be most relevant to you based on the time of year, so check back regularly.
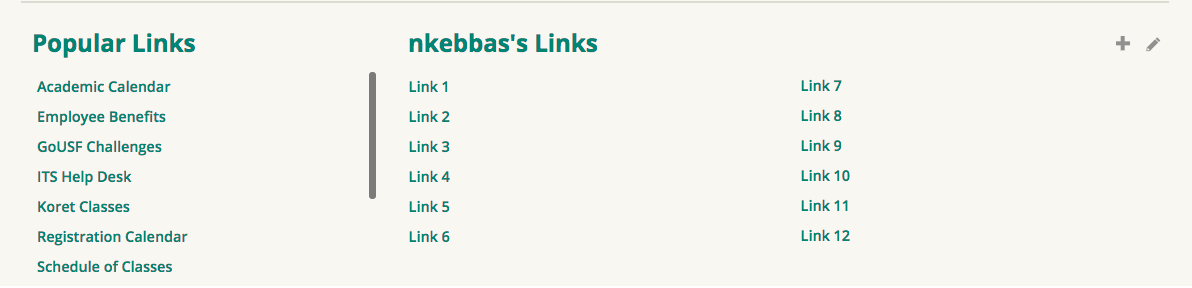
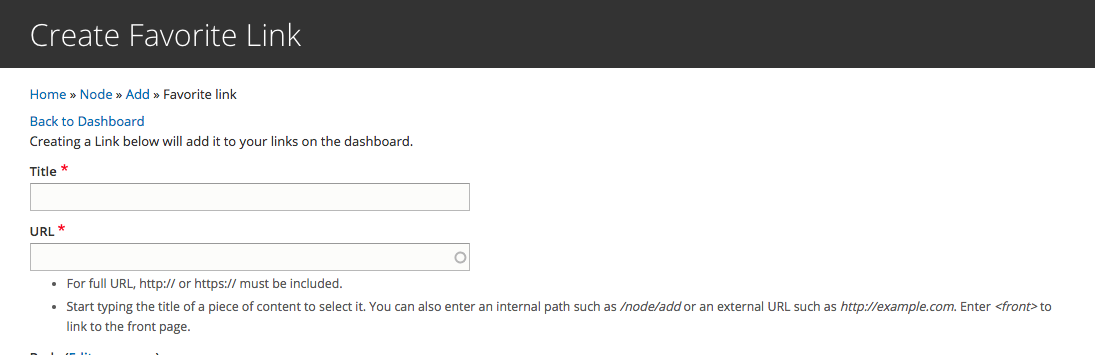
You can add your own links under the "Your Username's Links" section of the myLinks Area. To do so, first select the "+" icon in the top right corner of the myLinks box. In the "Title" field, input what you would like to call the link (how it will appear on your dashboard). In the URL field, input the URL of the page you would like the link to take you to.
You can also reorder and remove your personal links from view. To do so, first select the pencil icon in the top right corner of the myLinks box. Select "Unflag this item" to remove the item from being displayed on your dashboard. myUSF provides a draggle icon to the left of the link. To reorder your links, click the  icon and move the desired link up or down.
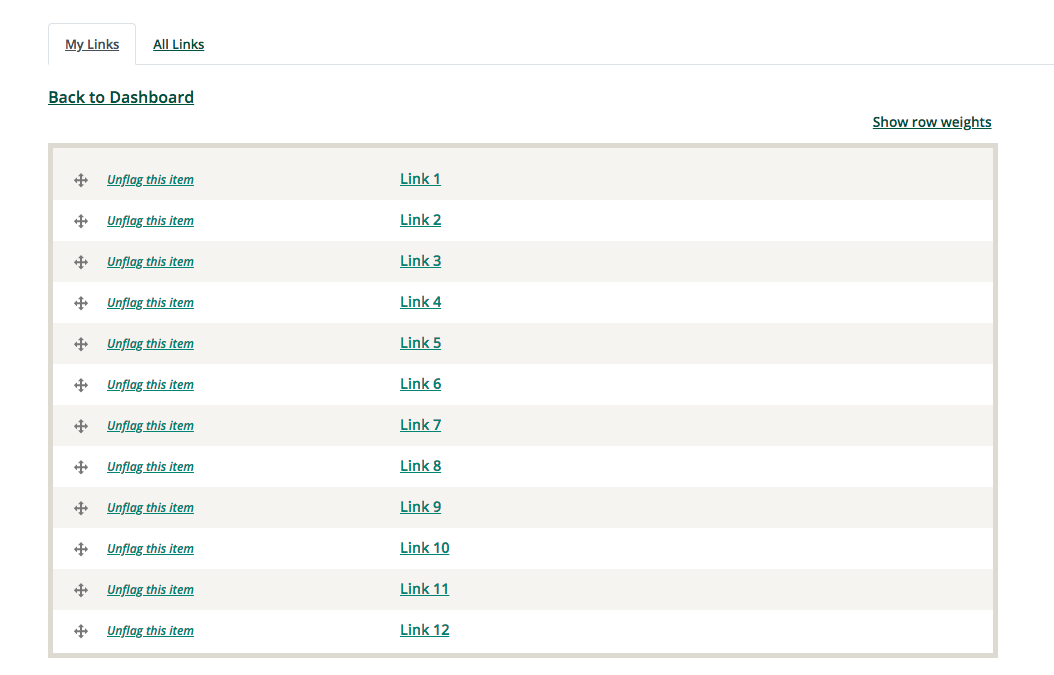
Note: Please use the draggable options to reorder links. If you do not see the draggable icons, please click "Hide row weights".
If you do not see the draggable option: If you do not see the draggable option, you will need to manually add "weights" to your links to order them. To make your link go to the top of the list, add a lower number weight. To make it fall to the bottom, add a higher number weight . Make sure that each weight is unique, or else that link will be hidden from view and will need to be added from the "All Links" page.
Events
Also on your dashboard is an event slider, with links to feeds of on and off-campus events that are relevant to you as a student, faculty, or employee.

Announcements
Below your events are your announcements, which will further help you stay involved with what's going on both on and off campus.

My Apps - All the Other Applications Available to You
To access your entire list of applications:
- First, ensure that you are logged into myUSF. If you see your name in the top right corner of myUSF, then you are logged in. If you are not logged in, there will be a button that says "Log In". Select that button to log in to myUSF.
- Select your name in the top right corner of the screen to open a drop-down menu. Then select "My Apps" from the drop-down menu.
Common Issues
Compatibility Mode for Internet Explorer
To view myUSF correctly, we recommend that you turn off compatibility mode; however, some system users require compatibility mode on Internet Explorer to use tools like Xtender. You can easily toggle this mode on/off as needed. Here are the steps:
- From the tools menu at the top of the browser, select 'Compatibility View settings'
- If 'Display intranet sites in Compatibility View' is checked, click the checkbox to deselect
- Please note: When using tools like Xtender, you will need to select the same checkbox
Additional Resources
Have any questions? Let us know »