Tables
Tables should be used to present data and not for formatting a page’s layout. An accessible table will generally have a caption, headers and scope attributes to define column/row headers.
Captions
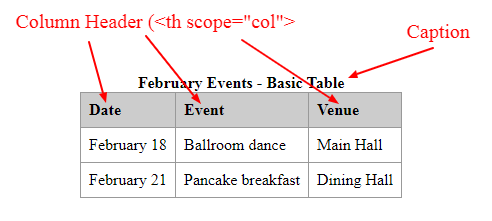
Table captions are not required, but it is a good idea to use them. Captions are like a title for the table that describe the purpose.
Header Cells
Header cells are required for each header. Use the <th> tag. Both columns and rows can have a header cell.
Scope
The scope attribute tells the browser and screen reader that everything within a column that is associated to the header with scope="col" in that column, and that a cell with scope="row" is a header for all cells in that row.
The following image illustrates the table caption element, as well as table headers and scope.
The following image illustrates the HTML code of a simple accessible table. The caption is the first element within the table, and is required.

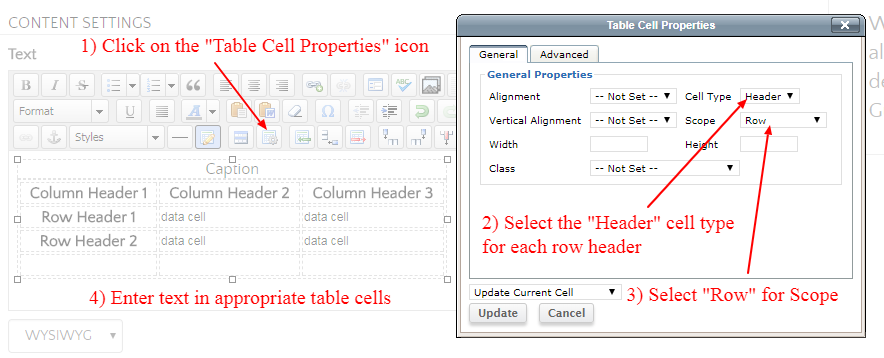
The following example is of a slightly more complex table. We have header cells for both column and rows. We also apply the scope to both the columns and the rows.
The following image shows the HTML code for a table with both column and row headers.

Creating an Accessible Table in the WYSIWYG Editor
To create a basic accessible table using the WYSIWYG Editor, we’ll include a table caption and header cells. Each header cell will also have a scope attribute that tells screen readers that the header applies to an entire column or header.
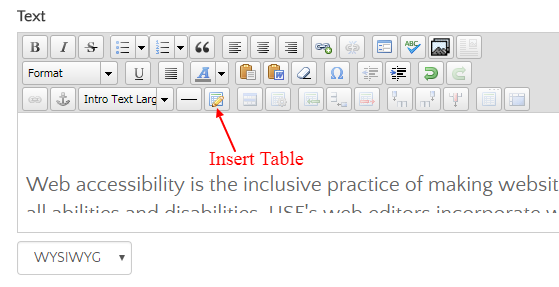
Step 1 – Create a Table
Click the “Insert table” icon as demonstrated in the following example.
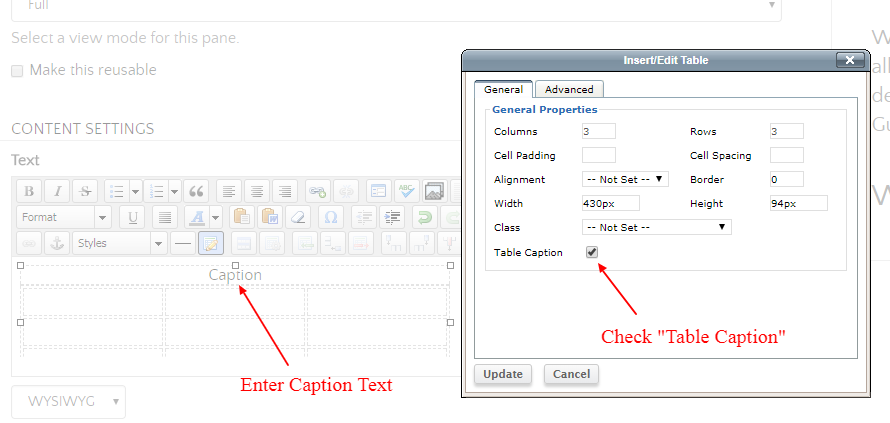
Step 2 – Add a Caption
As shown in the example below, in addition to choosing your table properties, check the “Table Caption” option and click “Update.” This will generate your table. Enter your caption in the top row of the table.
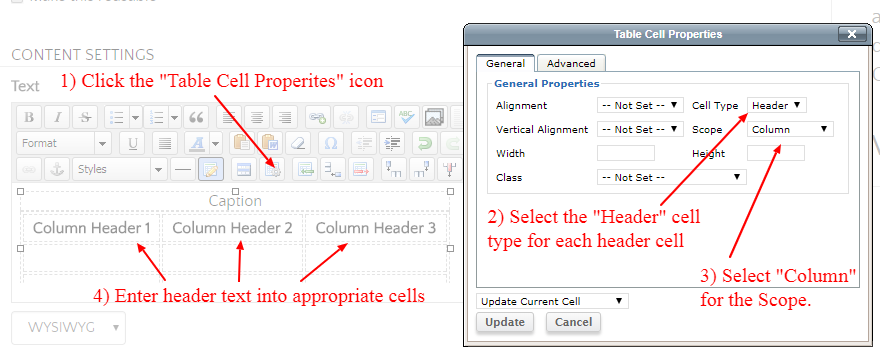
Step 3 – Add Headers and Scope
The following example screenshot demonstrates how to add headers and scope to your table. Headers can be applied to columns, rows, or both. In this example, we are applying headers with the scope set to “Column” for each column. Setting the scope to “Column” tells screen readers to associate the header of the column with every cell in the column.
- Click the “Table Cell Properties” icon.
- Select the “Header” cell type for each header cell.
- Select “Column” for the Scope.
- Enter header text into appropriate cells.
Step 4 – Add Headers and Scope to both Columns and Rows
The following example screenshot demonstrates how to add headers and scope to your table for both columns and rows. This is the similar to the previous example, but we apply the Cell Type “Header” and “Scope” to the row headers in addition to the column headers.