How to Access a Call List
Step 1: Click On/Open Call Link
- Each call link is unique to a specific all campaign. These should not be reused unless specifically instructed.
- Multiple staff can be working from the same call list at the same time and it will not impact each other.
Step 2: Log In

- Log into Slate using your normal USFCA user name (first half of your email address, no @usfca.edu) and your normal password.
Step 3: Fetch Next
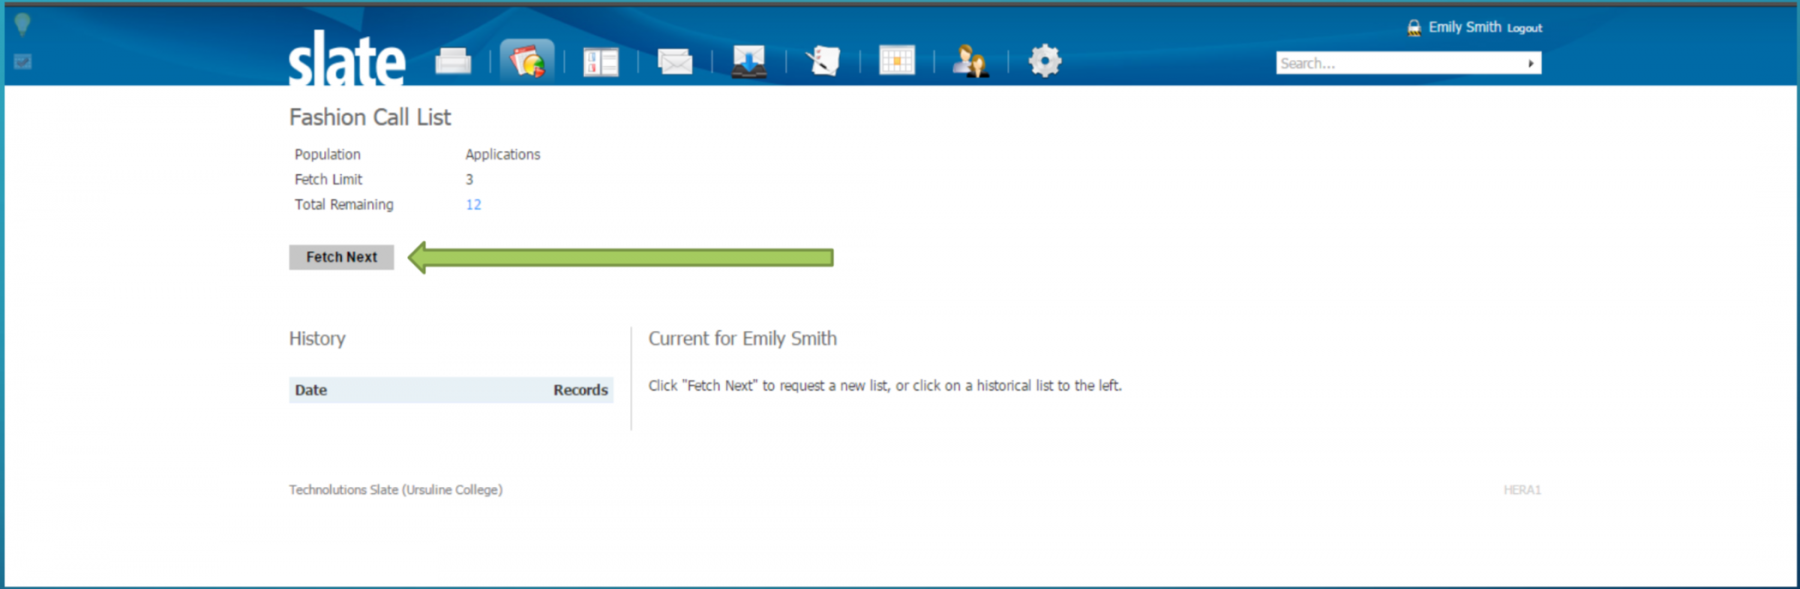
- Click "Fetch Next" to begin the calls.
- The total remaining shows the current number of students left to call.
Step 4: Check What you See
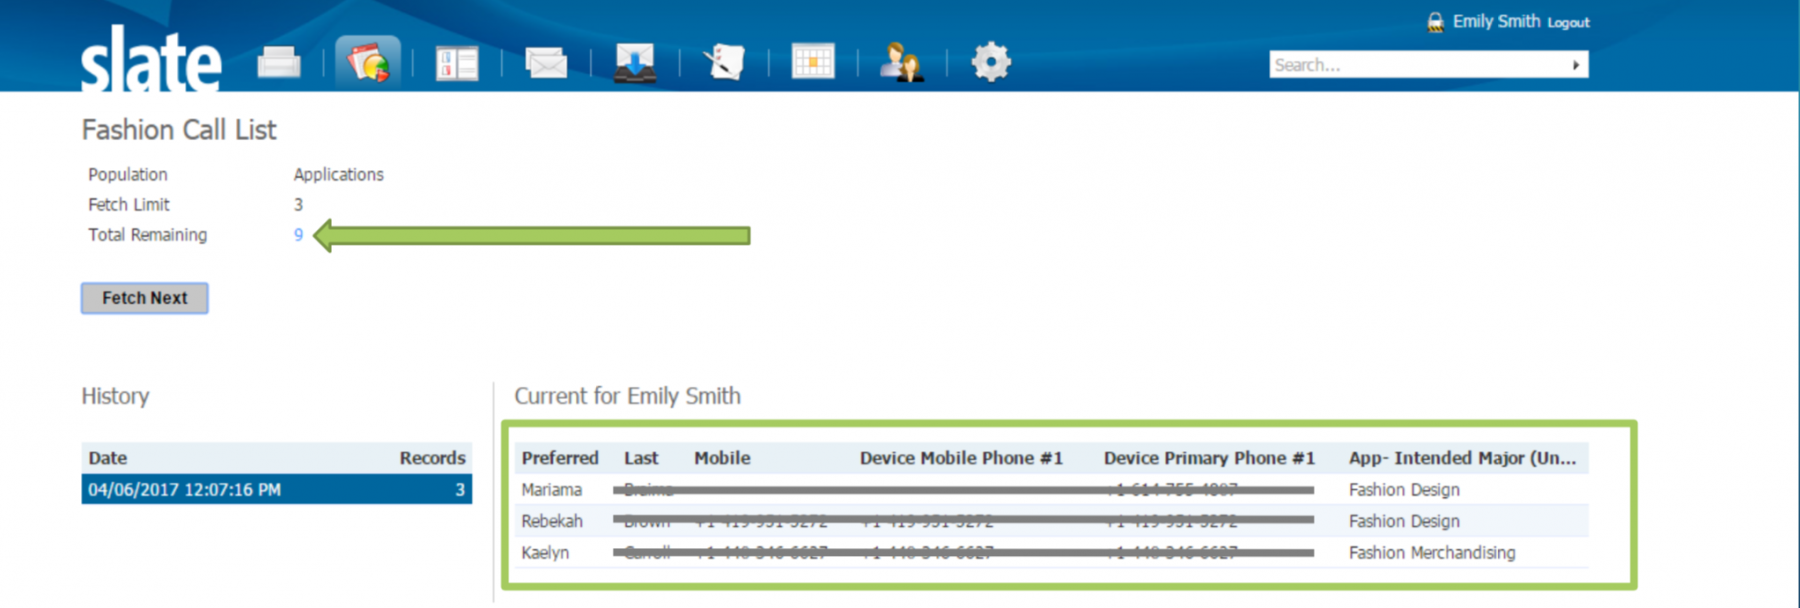
- The "total remaining" will drop by 3 each time you fetch, and 3 students will show per "fetch." A row will also be added to your history.
- You will see the student's name, phone numbers we have, and their major.
Step 5: Click on Your First Student
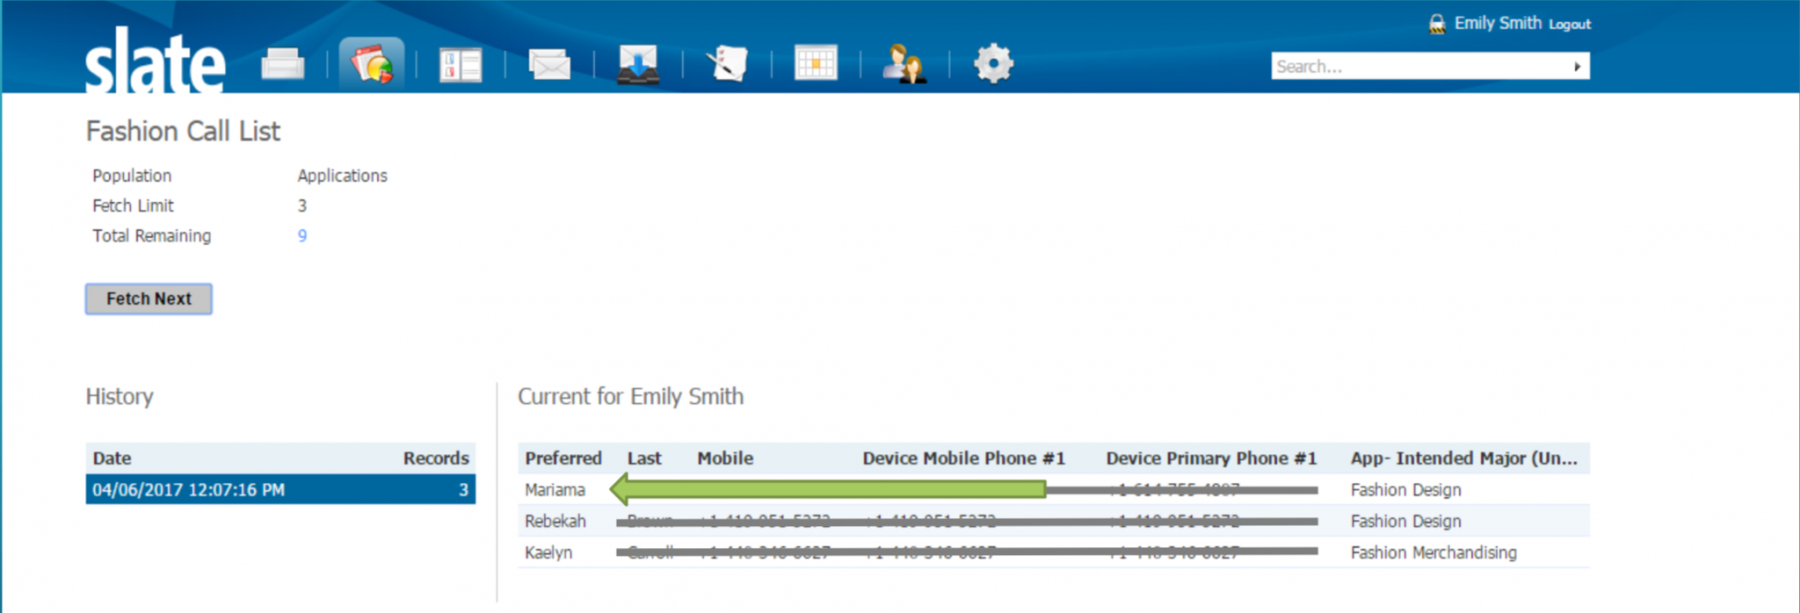
- Click on the first student in your list.
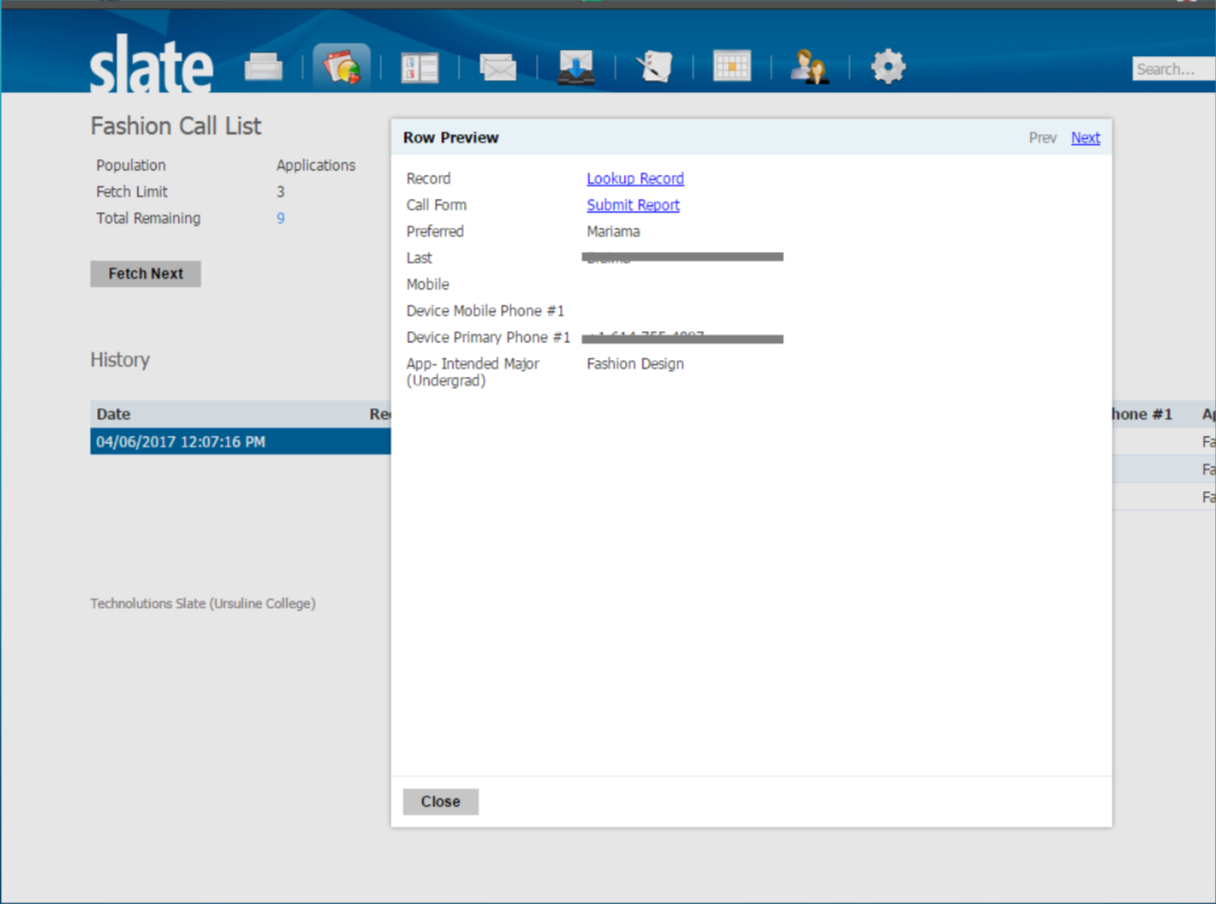
- A pop-up window will appear with the student's information.
Step 6: Call the Student
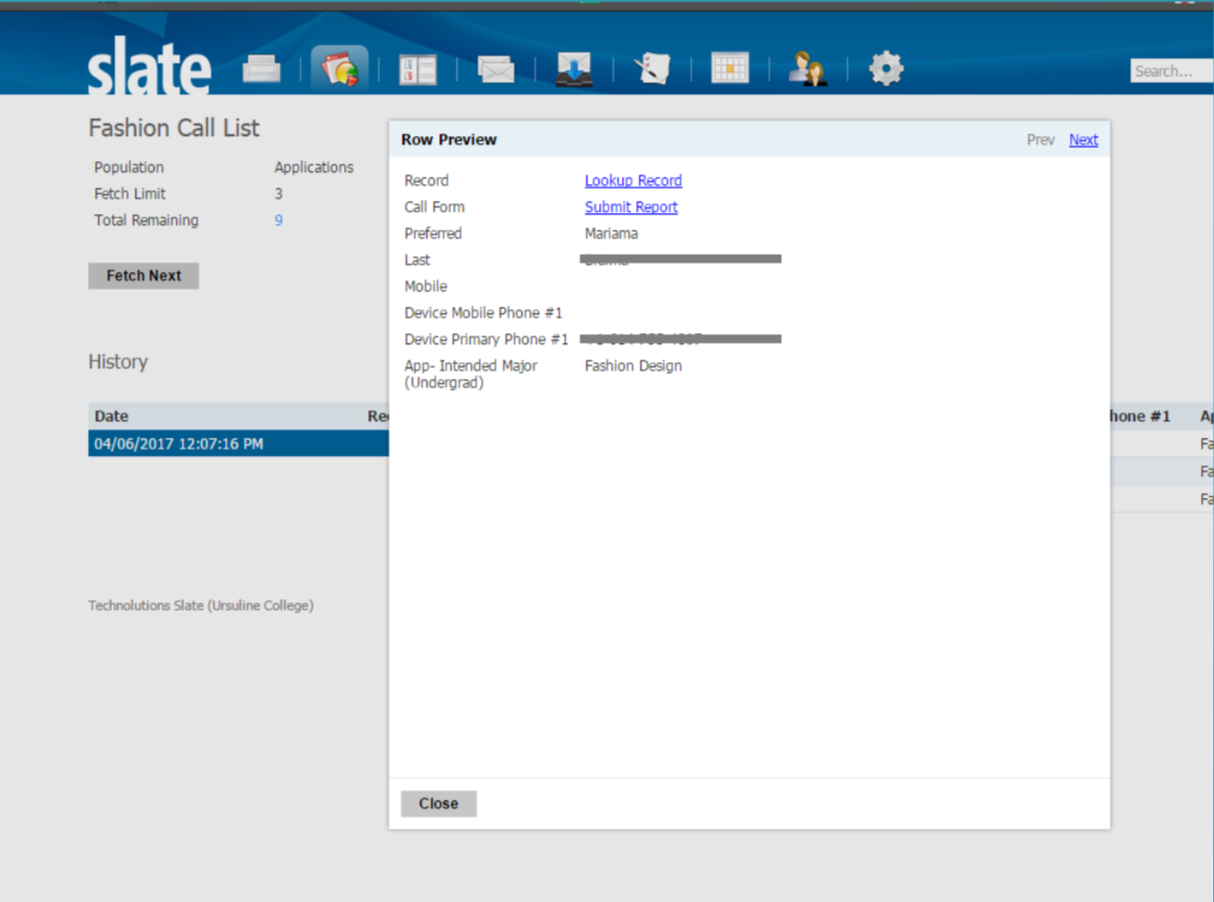
- Choose a phone number to call. You may need to try multiple numbers if that one phone is no longer active. Please note, that sometimes student will use their parent's phone numbers. That's okay! Sometimes talking with a parent can be just as meaningful.
Step 7: Click Submit Report

- After your call, click "Submit Report"
- A new pop-up window will appear.
Step 8: Complete Your Call Report
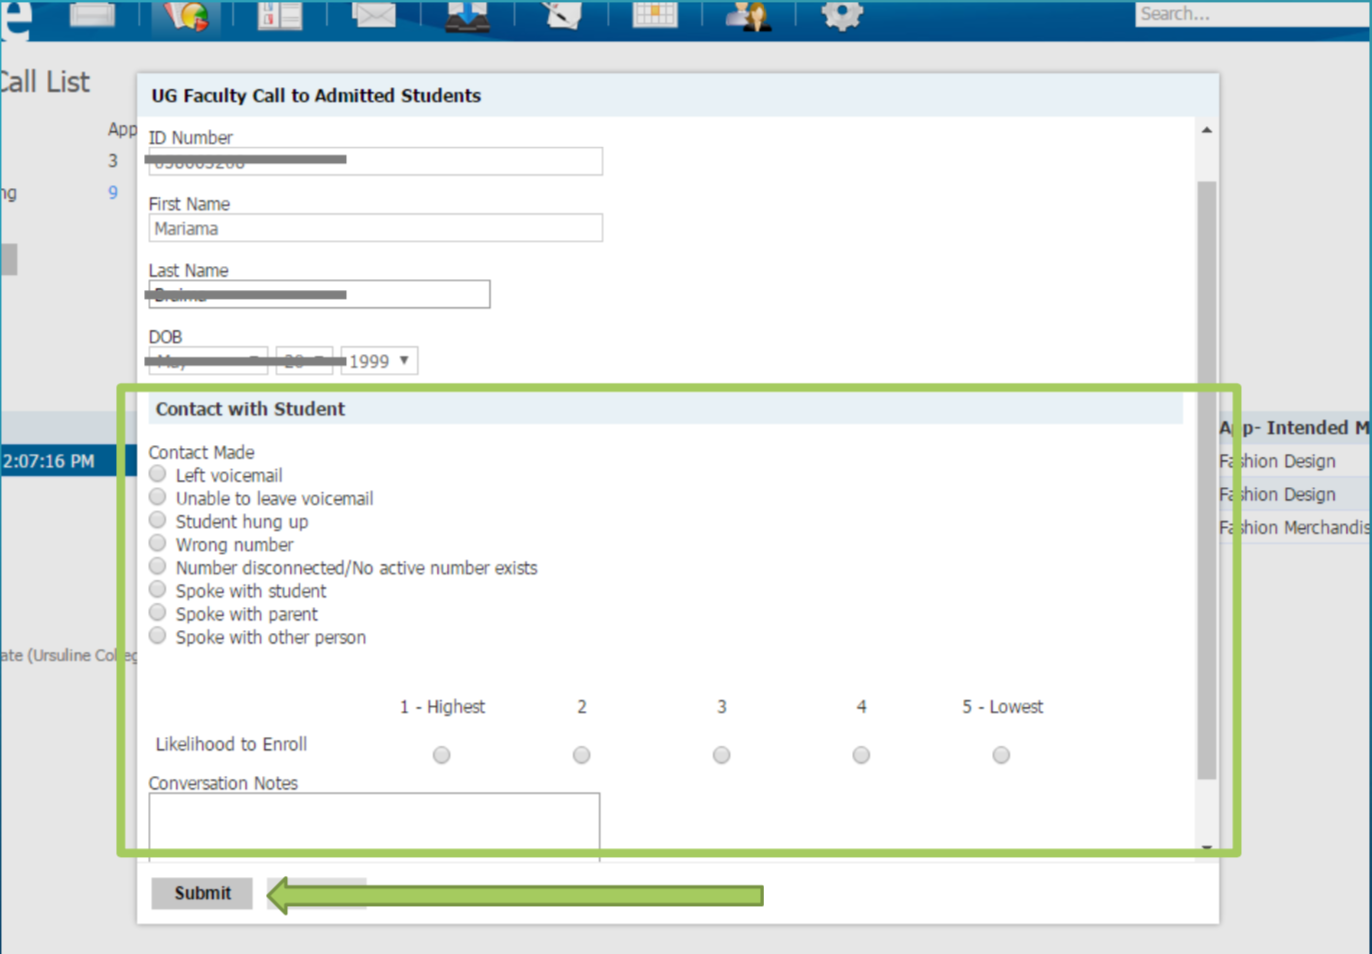
- Mark the contact
- If you spoke with someone (student, parent, etc.) You may also want to add more information about your feelings on if you think they may enroll and any notes about the conversation you had.
- If there were any issues regarding that call or if the student has additional questions and will need a follow up call or if they'd like to withdraw their application, please add that information to your conversation notes.
- Once you are done, click submit.
Step 9: Make Next Call
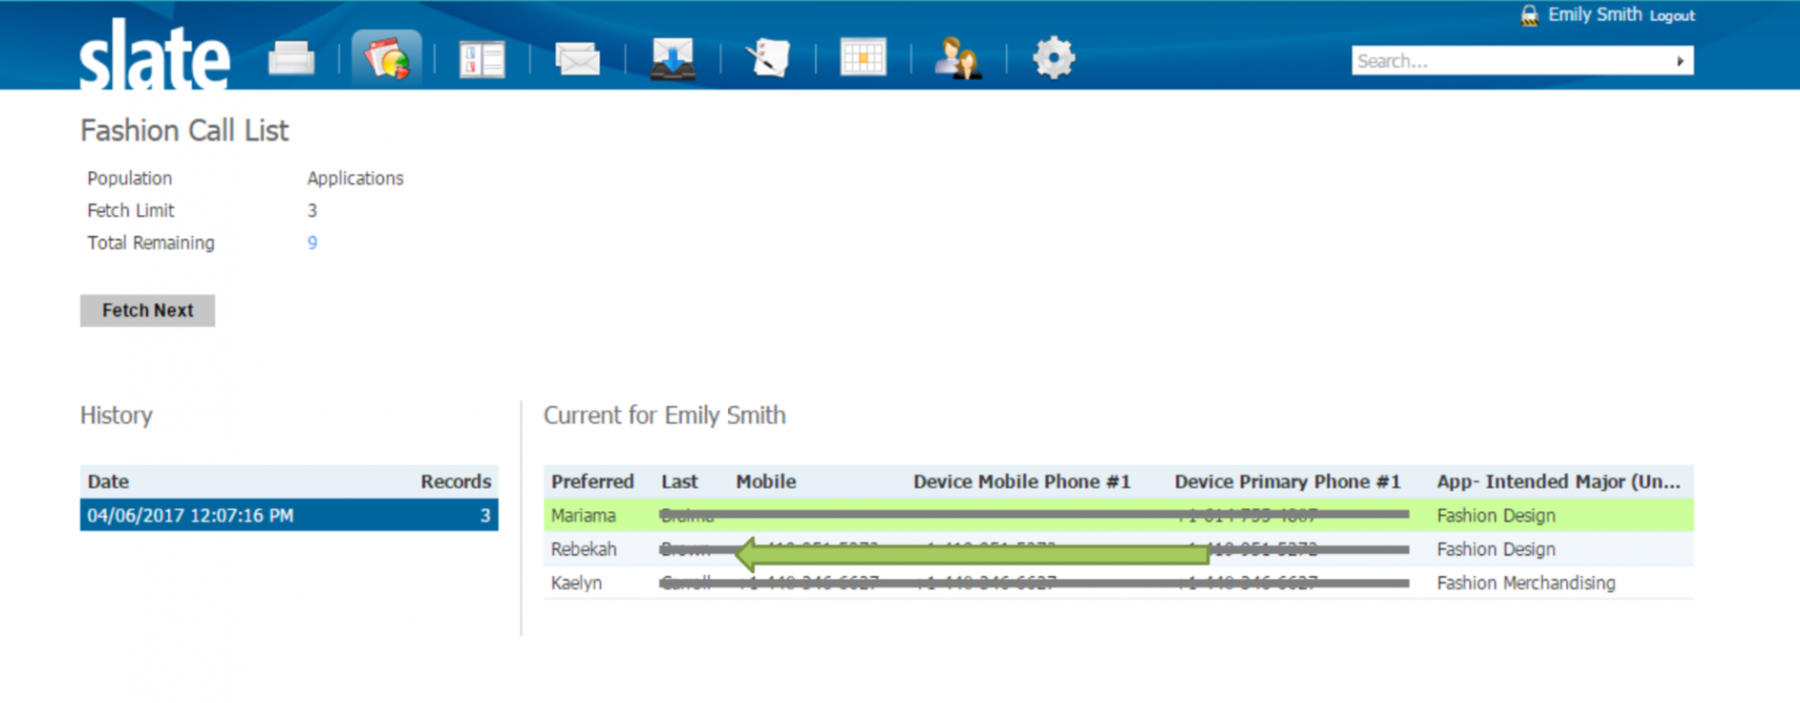
- The completed call will now be highlighted green.
- Complete steps 5-8 for your remaining students
Important Notes...
- If you navigate away from this website to a different webpage, your green highlights for completed calls will disappear. The call report was still submitted successfully, but you have lost your visual marker for where you left off.
- A student will only turn green once a call report is submitted.
- We keep these fetch numbers small (3 students) because we want to make sure you are able to complete all 3 calls at the same time. This cuts down on confusion and errors for calls. You will not be able to see all the students at once, and it is not possible to open/view the student again once a new batch has been fetched.
Step 10: Fetch Next
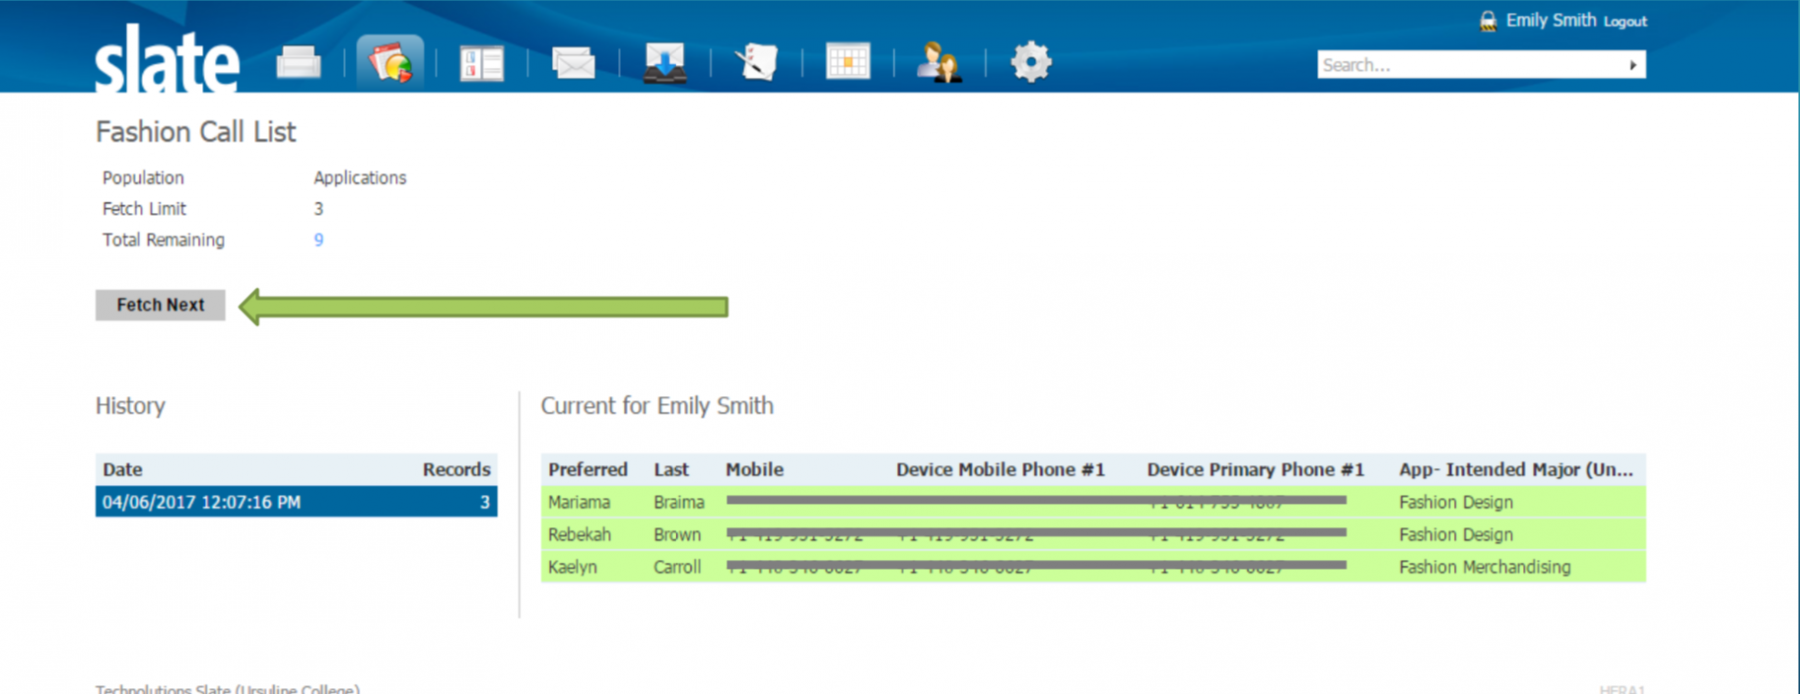
- Once you have called all 3 students (they should all be green now), click "fetch next" again to get a new batch of 3 students.
- Repeat the process until "fetch next" shows "there are no additional records available."