Create Event Landing Page
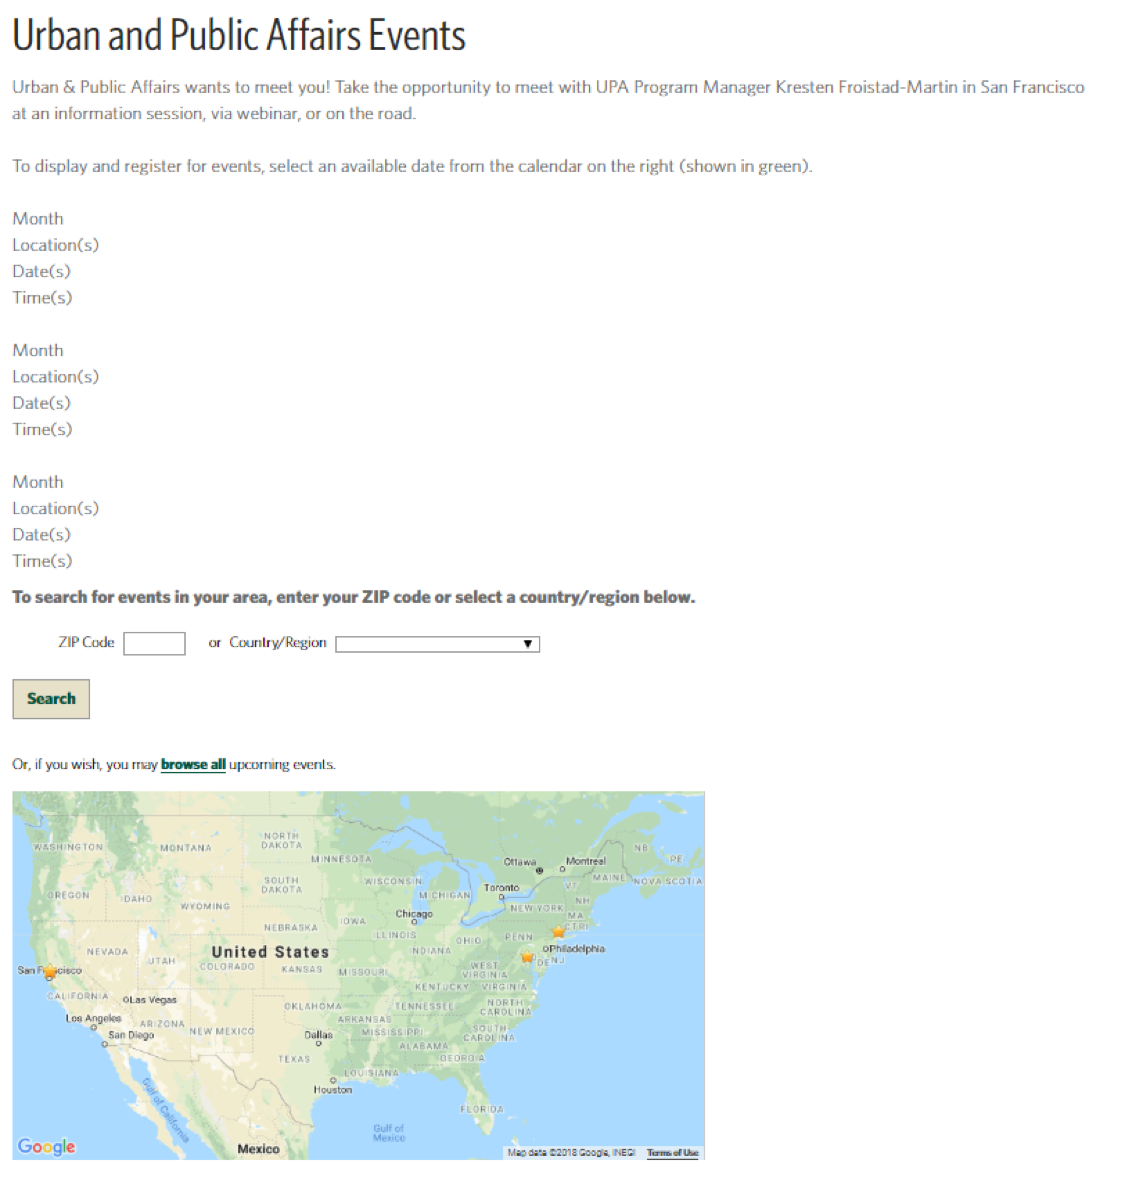
The UPA Events Page: https://gradapply.usfca.edu/portal/cas-upa-events
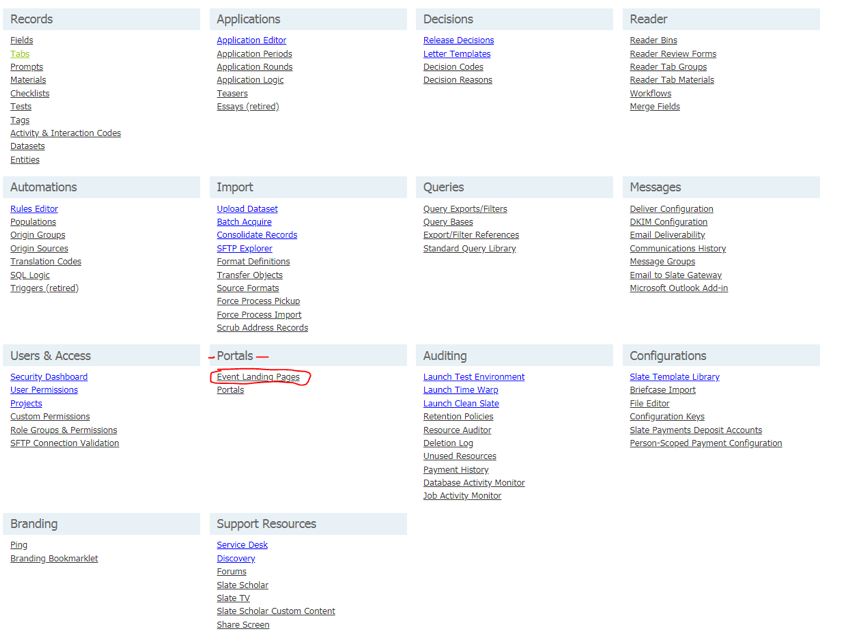
- Select the gear-shift symbol in the dashboard.

- Under “Portals” Select “Event Landing Pages”
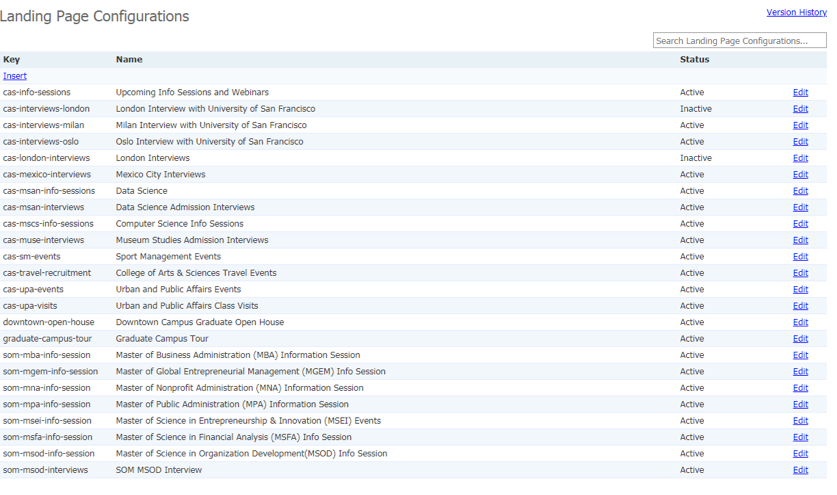
- Create a New Landing Portal – select “Insert” under “Key”
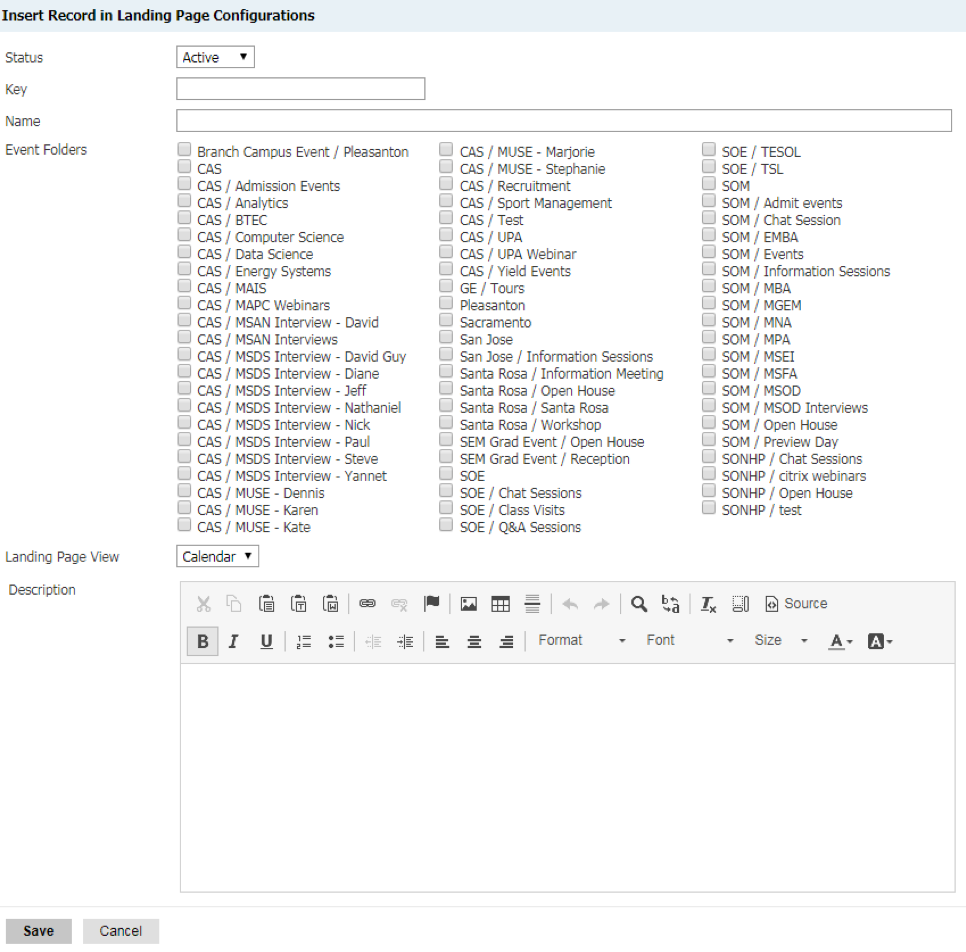
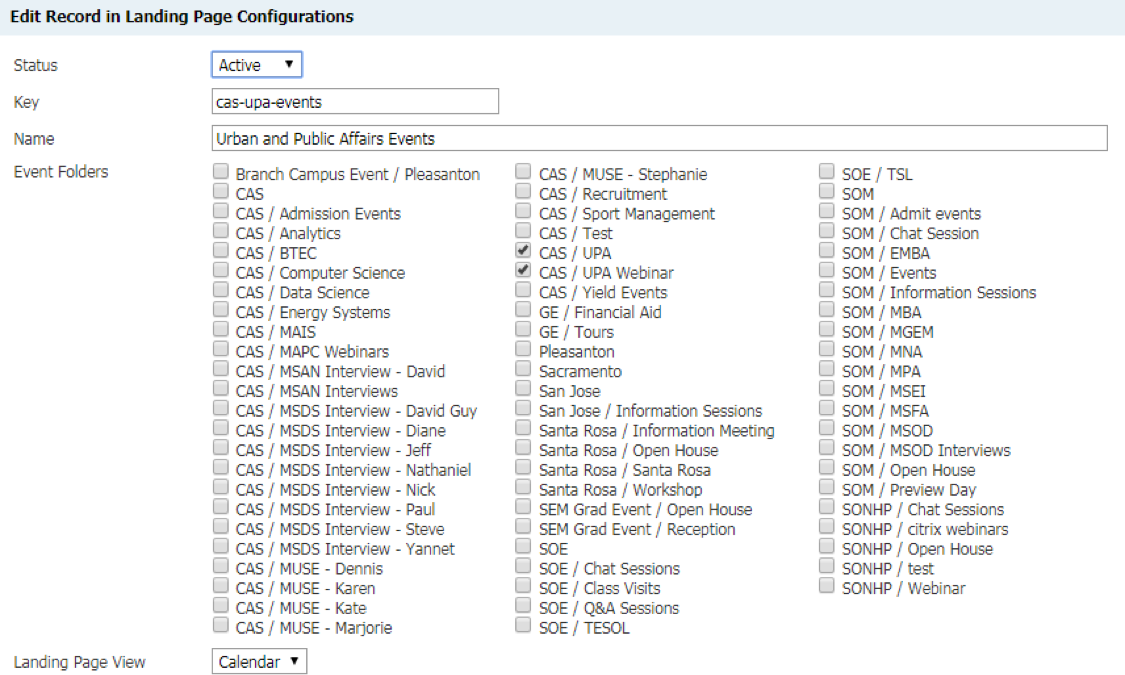
- Set the Landing Page parameters
Status: Active or Inactive
Key: This is the URL. Recommendation: cas-csb-events
** finals link will be: https://gradapply.usfca.edu/portal/thekeyyoucreated
Name: This is the “Title Heading” on the landing page
Event Folders: The folders contain the event, interview, webinar you want posted on this website. For example, any event saved in Folder CAS/Computer Science will display on this landing page. Landing Page View: Map, Calendar, List.
You should play with these setting to determine which “View” your prefer.
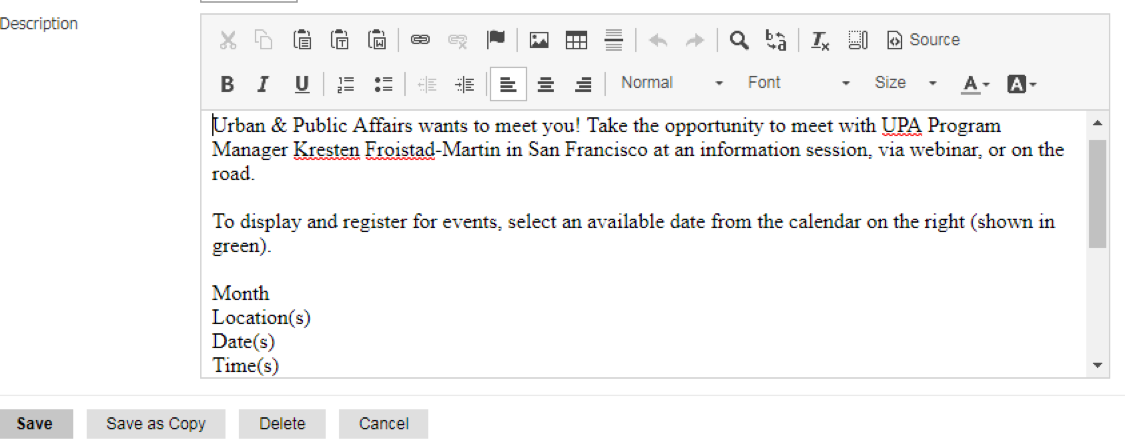
Description: This is the text below the “Name” In this text field you can add instructions, program descriptions, etc. The prospect will see this. You do not need HTML skills, simply type normally into this text box and it will auto format.
Save!
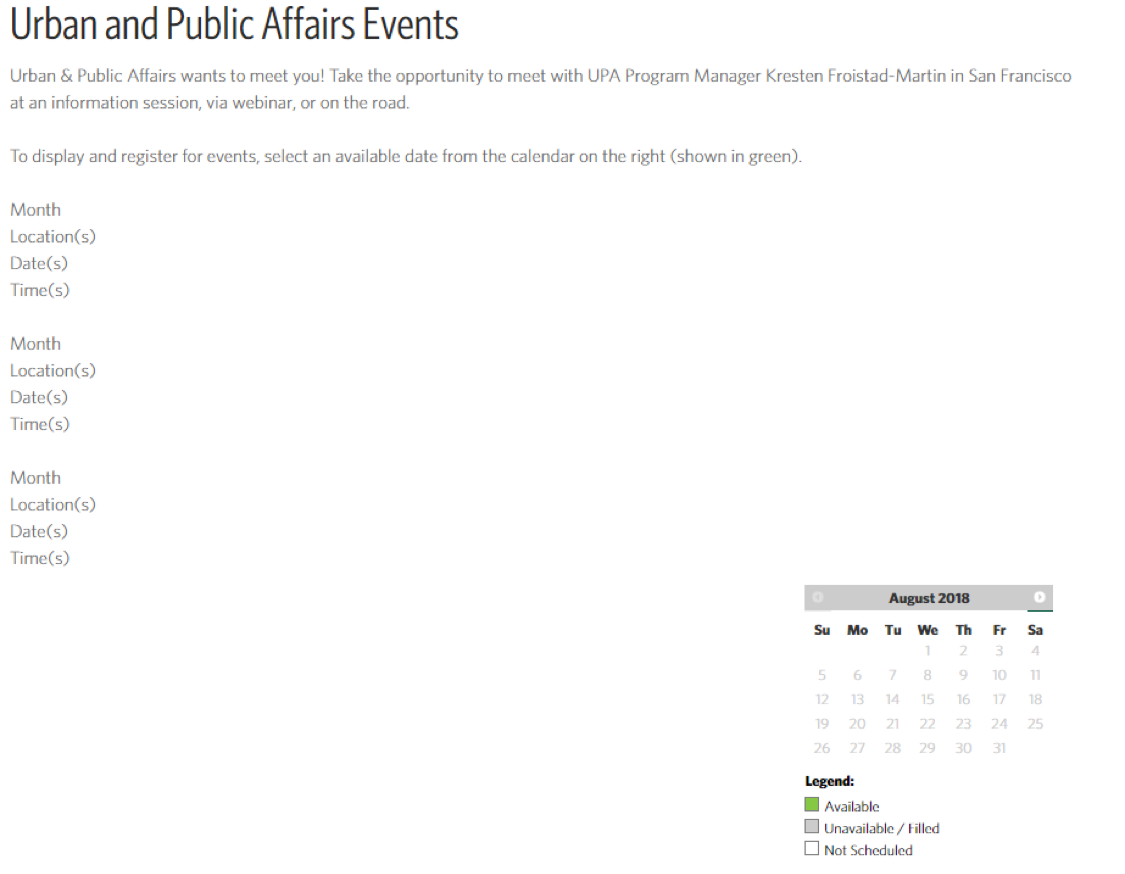
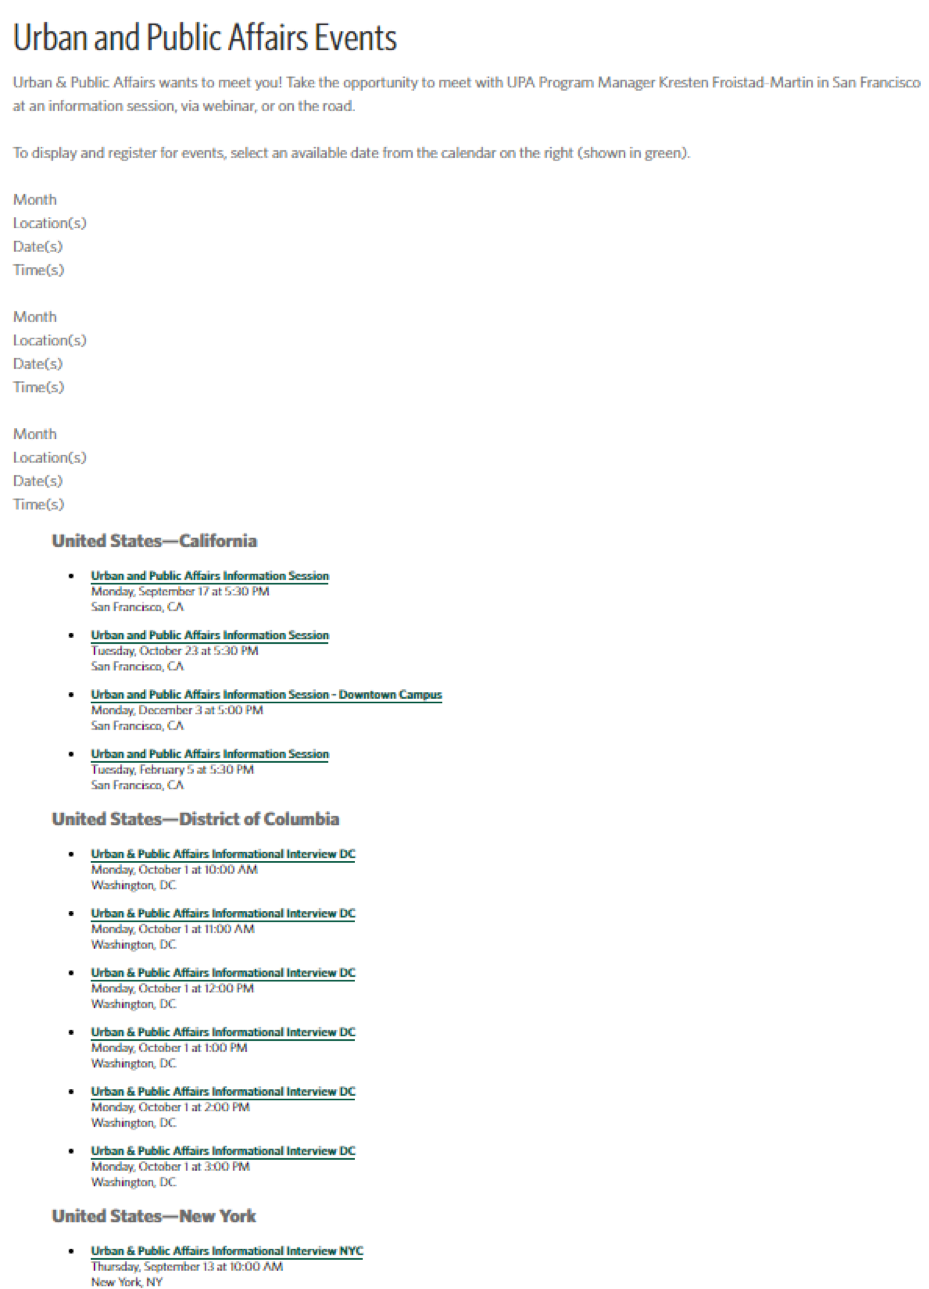
Example:
Calendar View
List View
Map View