Engaging Your Students Using a Whiteboard
Written by Angie Portacio and Mishiara Baker
October 8, 2020 • 6 minute read

Whiteboarding is an active process in which you can guide students toward understanding using text and drawing during your explanation, as well as respond dynamically to questions or issues that arise during class. It allows your students to clarify and define their own understanding of course concepts through verbalization or demonstration.
Just like its predecessors, the chalkboard and the overhead projector, using a whiteboard helps instructors develop students’ understanding by using a dynamic, live and potentially responsive approach as they note key points to remember — for example, diagram a process flow, or respond to a question.
Writing on a whiteboard provides a visual display of information to help students understand class content. Whiteboarding can be used to create dialogue with students around the content as they can respond to you and build understanding.
Benefits
- Demonstrate math formulas and coding strategies
- Create visual representations of key concepts
- Brainstorm ideas and concepts
- Students can demonstrate understanding of course concepts through visualization
- Building understanding live can be more dynamic than static slide presentations
Techniques
- Concept Mapping
- Diagramming
- Process flow
- Visualization or modelling of information
- Interactive student demonstration
- Sticky notes class activity
- Verbalizing understanding of key concepts
- Gallery Walk
Here are some suggestions for whiteboarding, physical and digital, to consider as you teach remotely.
Physical Whiteboards
With a camera and a writing surface you can broadcast your writing.
What do you need?
- Writing:
- Paper & pen (high contrast and thicker pen tips work best)
- Small hand held white boards & dry erase markers, OR:
- A larger, heavier whiteboard propped up, mounted on a wall, set on an easel or placed flat on a chair or table
- Camera:
- Laptop camera - use your laptop camera to show your whiteboard (and yourself)
- External Webcam - mount an external webcam to show only your whiteboard
- Document camera - use a document camera with software to show your writing on paper
Be sure to turn off screen mirroring if you are using Zoom (in Zoom video settings).
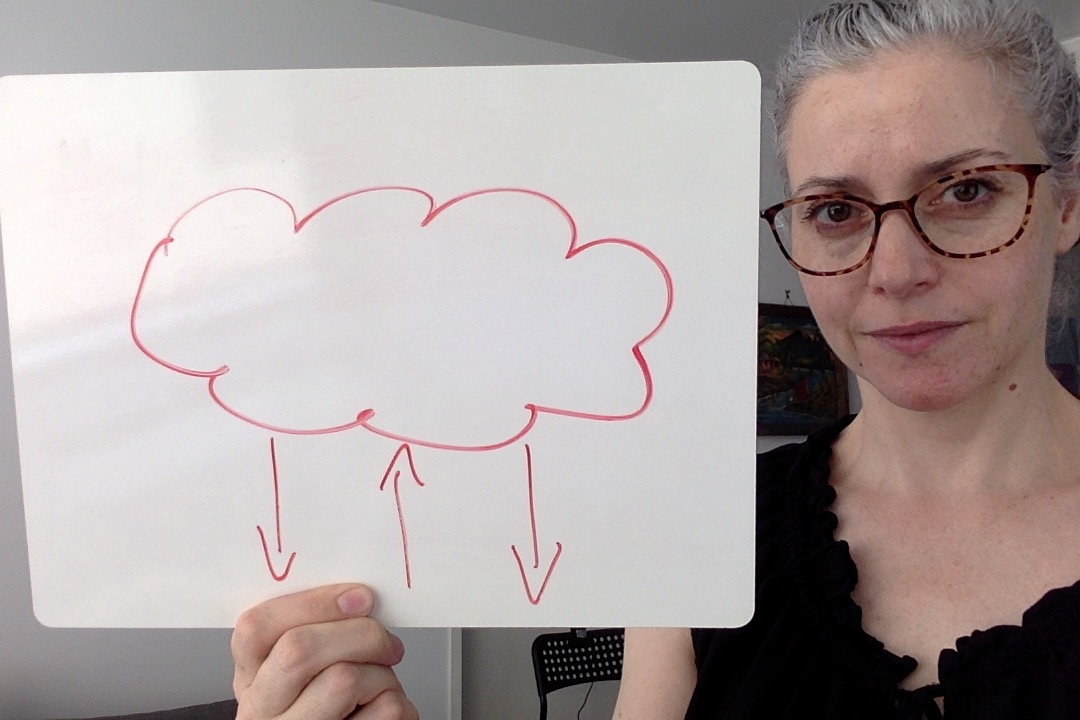
Example 1: Draw or write on a small whiteboard and hold it up to the camera
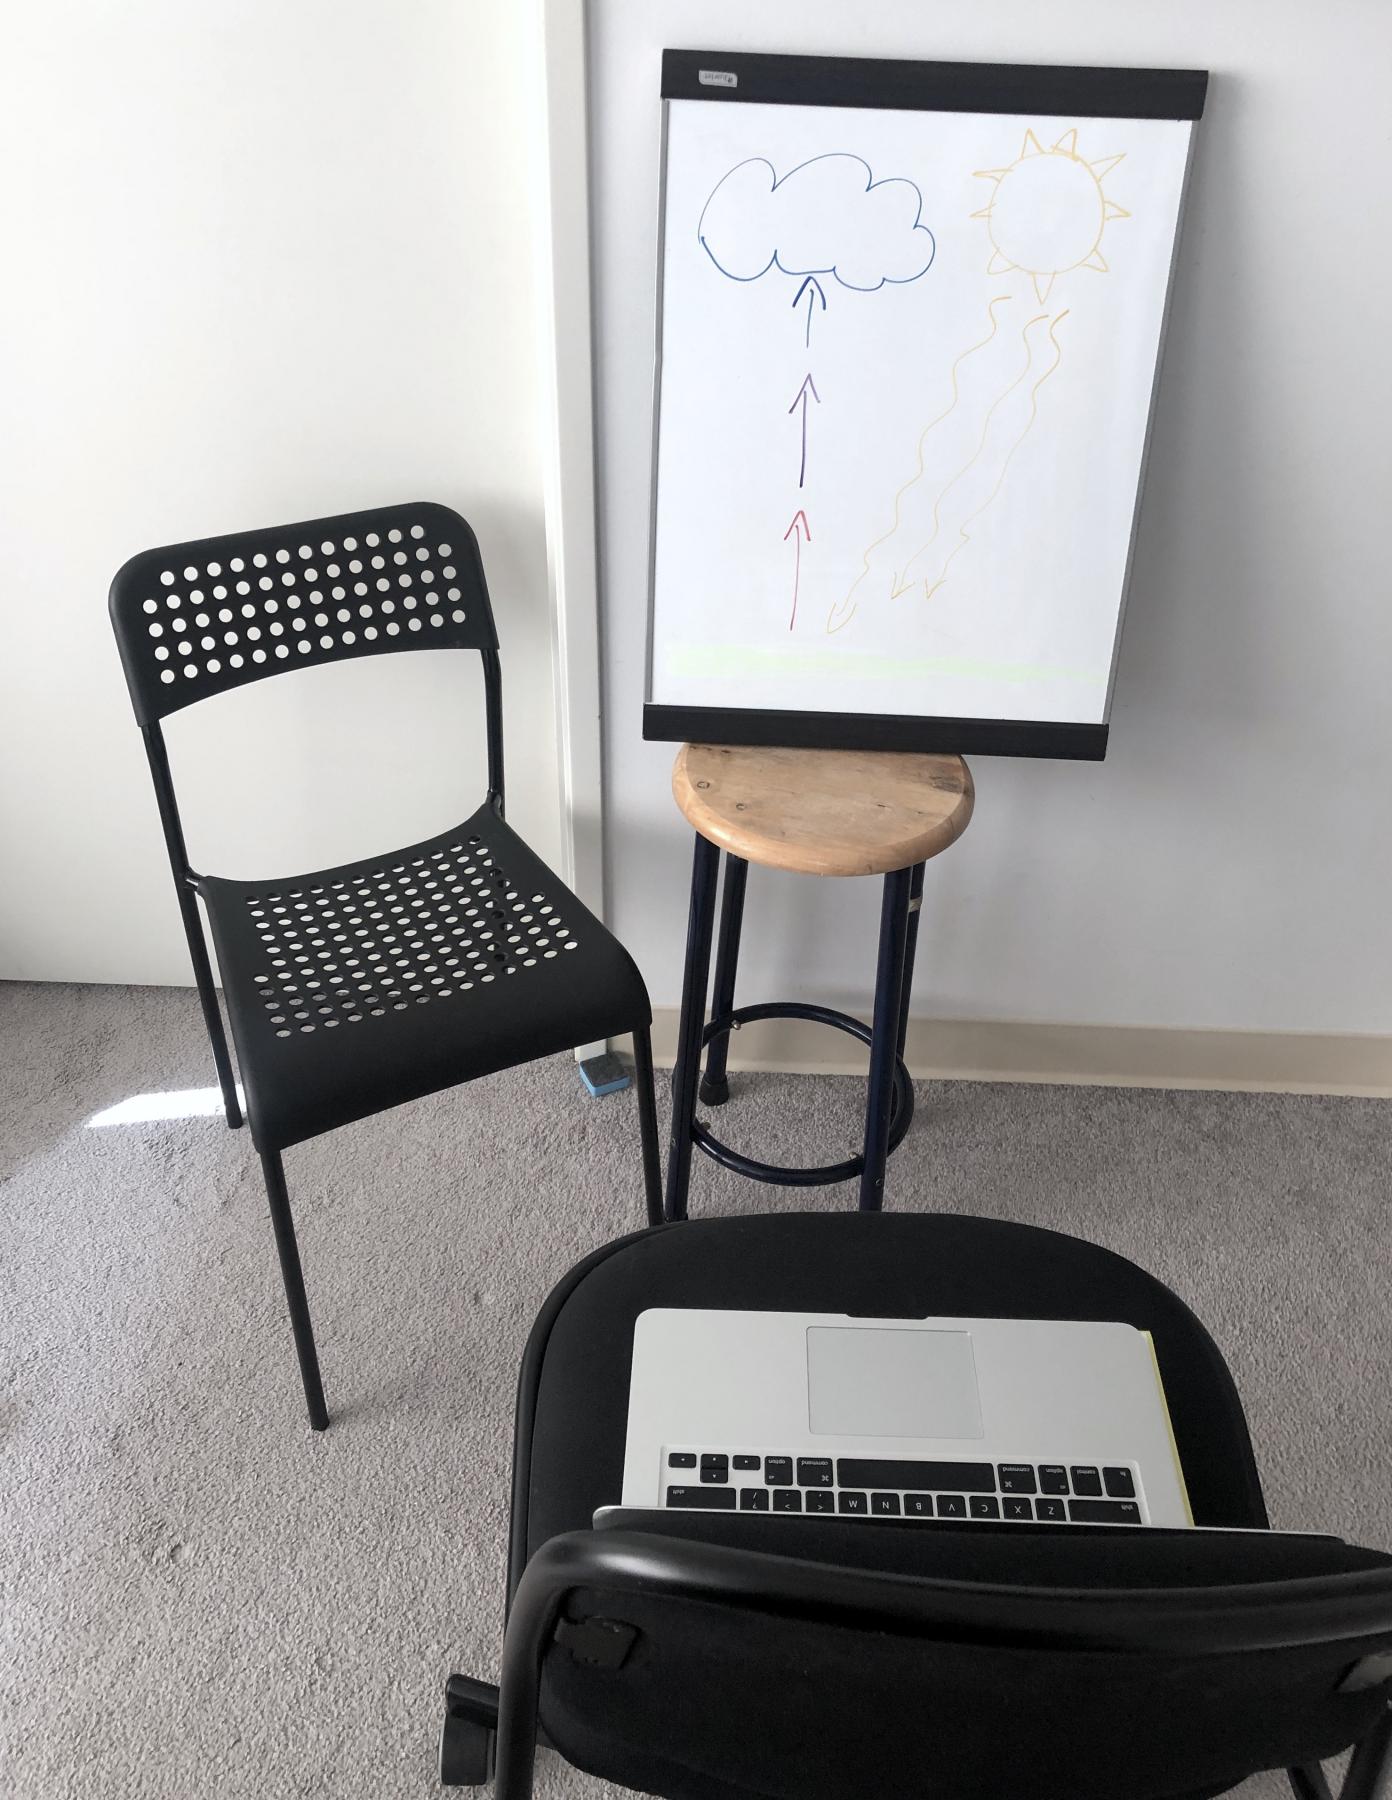
Example 2: Write or draw on a larger whiteboard propped up on a chair against a wall and capture yourself and your whiteboard using your laptop camera
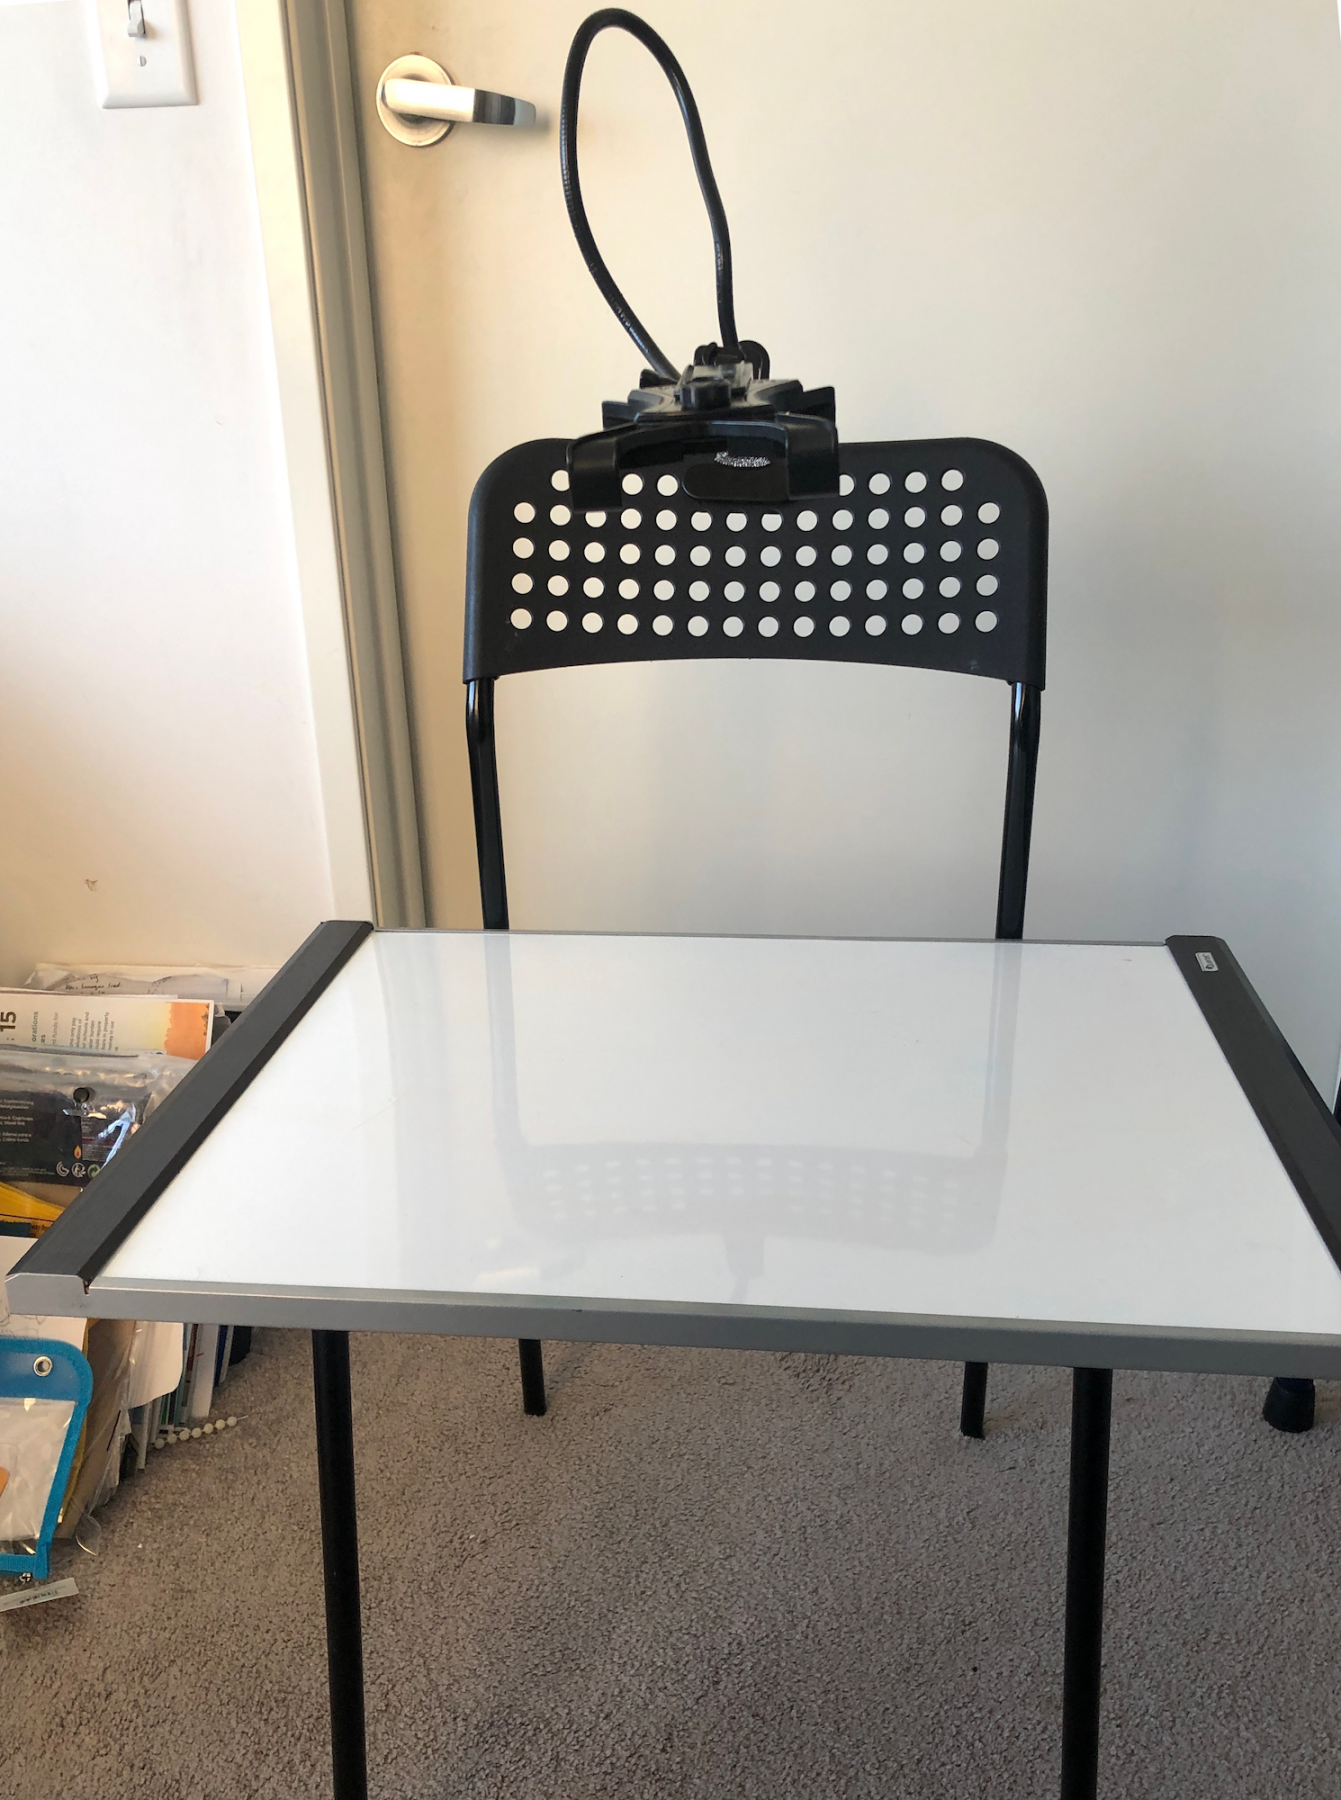
Example 3: Use an external webcam (such as Logitech) to show your whiteboard
Lay the whiteboard flat on a chair or table and mount the webcam over the surface. This is doable but takes some troubleshooting and practice. Clamp the manipulable tripod onto the back of a chair or on a table across from you. Use a post-it note pad or drink coaster under the clamp to steady it. Mount the Logitech camera pointing away from you, so that when it unfolds it points down at your workspace and your writing appears right side up. Set the webcam as your video source for Zoom (or other application) when you want to show your whiteboard.
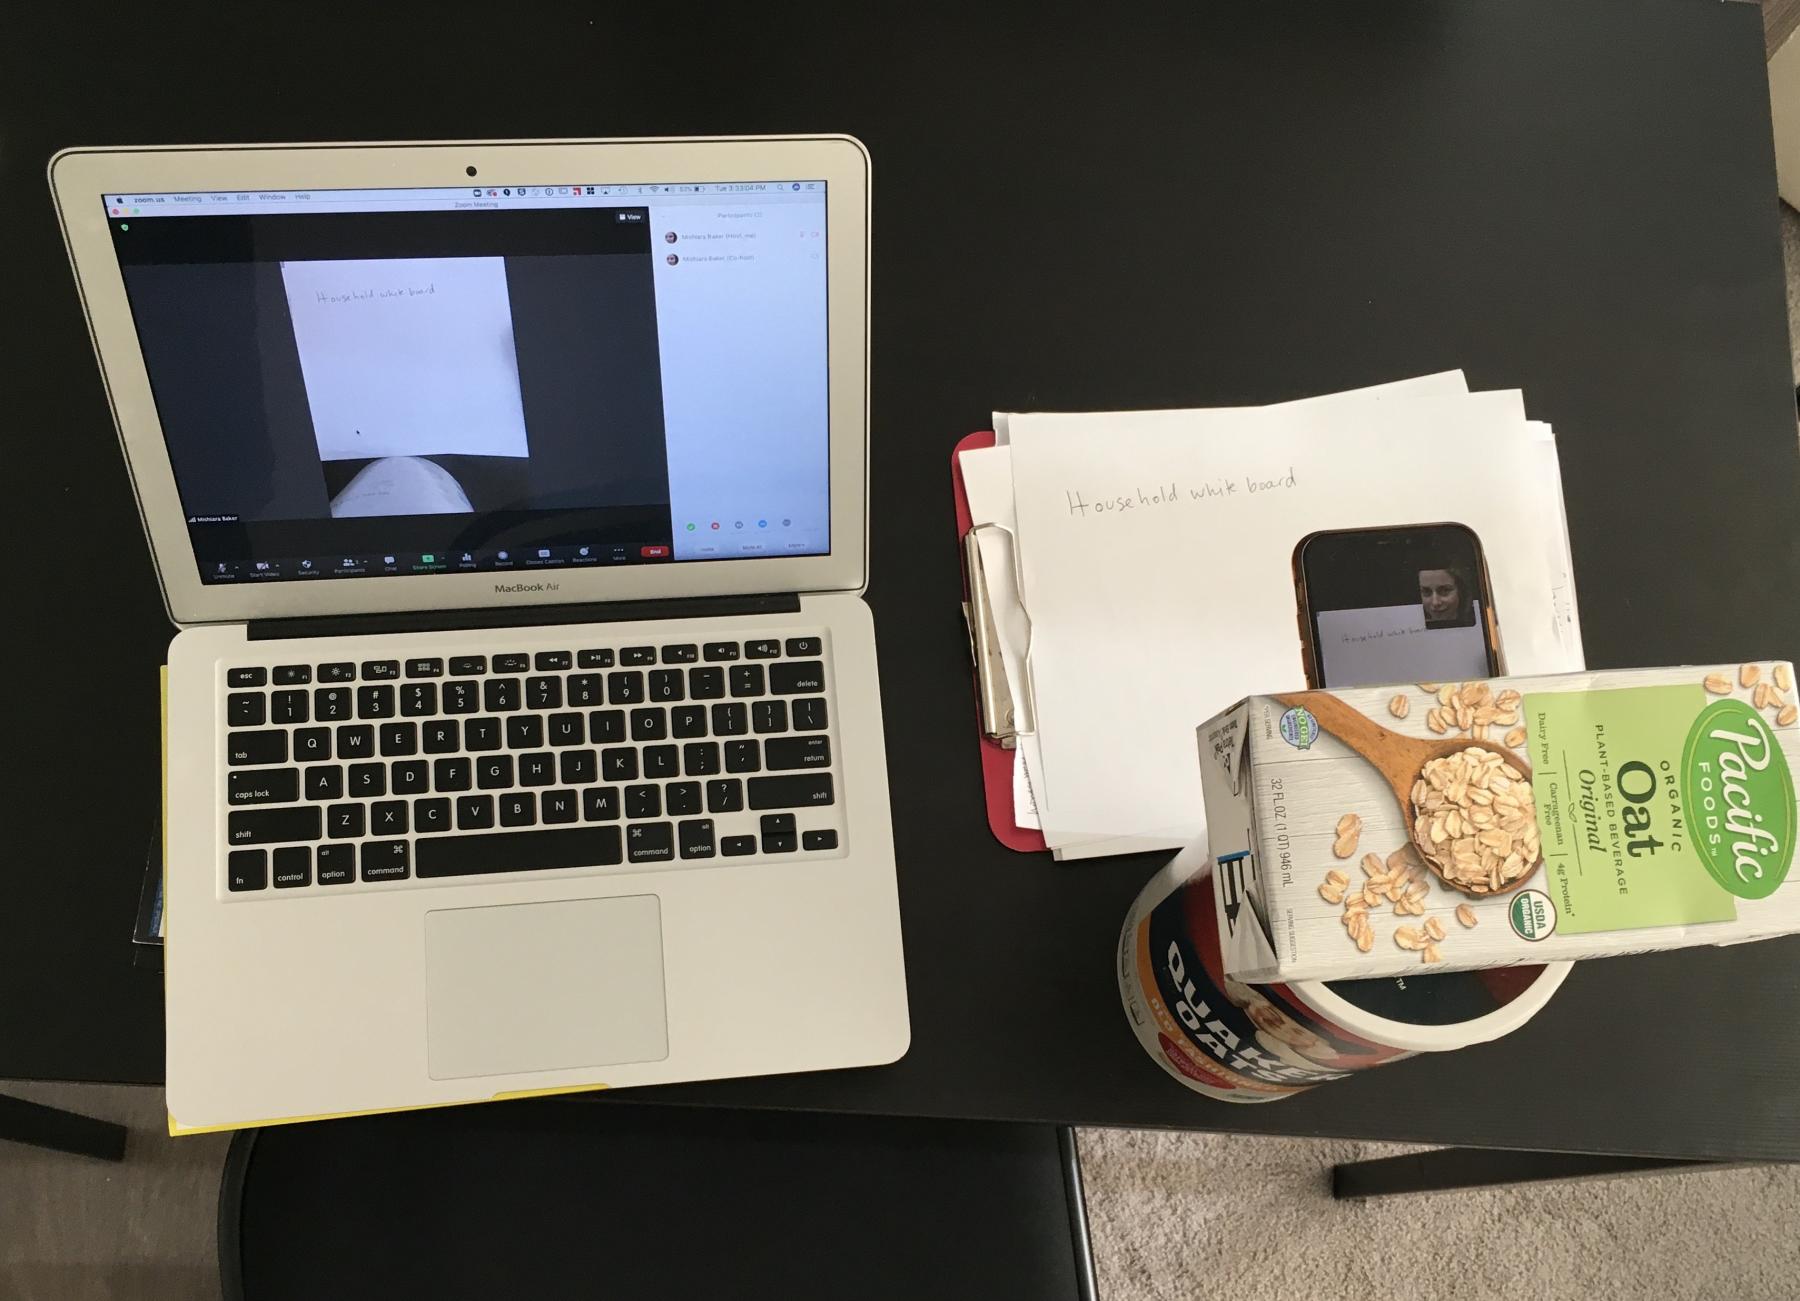
Example 4: Smartphone as a Document Camera
How to set up
- Join the Zoom meeting via the Zoom app on your smartphone. You can also send yourself an invite via email and click on the link in the email to join the meeting on your phone.
What do you need?
- Zoom app on your smartphone
- A tripod with a smartphone mount adapter such as this one OR: DIY mount such as a stack of books or kitchen items
Digital whiteboarding with a tablet and stylus
Using a stylus and tablet makes writing on screen easy. It can feel more natural to hold a pen and allows for greater precision when drawing and writing. A stylus enables precise control of the screen to allow for drawing or navigating as you might with your mouse.
You can:
- Annotate anything on any shared screen in Zoom using Zoom’s Annotation tools
- Write on a Zoom whiteboard
- Share screen and write in any other application that allows for drawing
- Use for writing with any other whiteboard or drawing enabled app
Options
Tablet such as Wacom or Ex-pen
A tablet such as a Wacom tablet and stylus can be inexpensive. Although you cannot see what you are writing on the tablet itself, you are enabled to write on the tablet and see it on your screen.
How to set up
- Follow product instructions to connect your tablet and use the tablet and pen.
- With Zoom, Share Screen and select Whiteboard or Share Screen and write on your screen with annotation tools in Zoom or write within another whiteboard application.
iPad with Stylus
- An iPad can be used as a screen share in a Zoom session and an Apple Pencil can be used to write on screen.
How to set up
- Click on the Share Screen option from your computer when a Zoom session and select the Share iPhone/iPad via cable or Share iPhone/iPad via AirPlay option (most reliable).
- Instructions will appear to Swipe down from right corner to see control panel and tap “Screen Mirroring,” then select your Zoom session; OR
- Join the Zoom session from the iPad and share screen.
Free Whiteboard Apps
USF provides access to the Google Suite, including Jamboard. Students can share their “Jamboard” with you and their partner in a breakout room and then take turns presenting their work to the class through Zoom. The tools are pretty basic with a pen tool for students to write with a mouse. You can have multiple boards and set them up before class and assign students to work on a specific board but they will also have access to see the other boards.
Note: Students living abroad may not be able to access Google Apps.
Students can access this tool on any device. You can also save all the jamboards as a PDF.
- YouTube video: How to Use a Google Jamboard for Remote Teaching
- YouTube video: 2020 Updates to Google Jamboard
This whiteboard app lets you create a class and then send your students a link to be part of the class similar to zoom. You and your students will have individual whiteboards and as an instructor you can see all your student whiteboards as they are in progress. The instructor will have control of pushing information to all the whiteboards. One of the capabilities of these tools is the ability to enter math equations so students do not have to use a pen tool to write their work. Students can work on equations in pairs in breakout rooms and save their work. Then after the breakout room, you, the instructor can click on each whiteboard and you can lead a group discussion on each problem. If you want to give the students privacy, you can hide their names and still present each whiteboard in class and provide feedback.
Students can access this tool on any device. Students or yourself do not need to create a profile or username. Students who enter your whiteboard.fi class have to enter their name and you can control who enters the room through a lobby. You can save all your students' whiteboards as a PDF before you close the session. Students can also save their own whiteboards.
Here’s a useful video on How to use Whiteboard.fi Free Digital Whiteboard.
Other Free apps with an option for a paid subscription
- explaineverything.com
- mural.co — teachers and students can apply for free accounts
Are you or someone you know finding success with using a whiteboard in your remote course? If so, we’d love to hear from you! Email instructionaldesign@usfca.edu to share your story.
List of USF's Educational Technologies
Not sure where to start? We are here to help.
To learn how to implement whiteboarding into your course effectively, contact Instructional Design to request a consultation.
Contact Instructional Technology & Training to schedule a training session and access self-guided training materials.
Resources
- Zoom on YouTube: Zoom EDU: Screenshare and Annotation (Zoom Whiteboard)
- What is MURAL? (YouTube video)
- New EdTech Classroom: How to use Whiteboard.fi Free Digital Whiteboard (YouTube video)
- Ditch that Textbook - 10 Online Whiteboard Options for Remote Learning
Research
- WHITEBOARD: A Learning Process
- Advances in Physiological Education - Using whiteboards to support college students’ learning of complex physiological concepts
- The interactive whiteboard and the instructional design in teaching physics
- Distributing Cognition Using Whiteboarding Techniques
- The Old Chalkboard Mojo